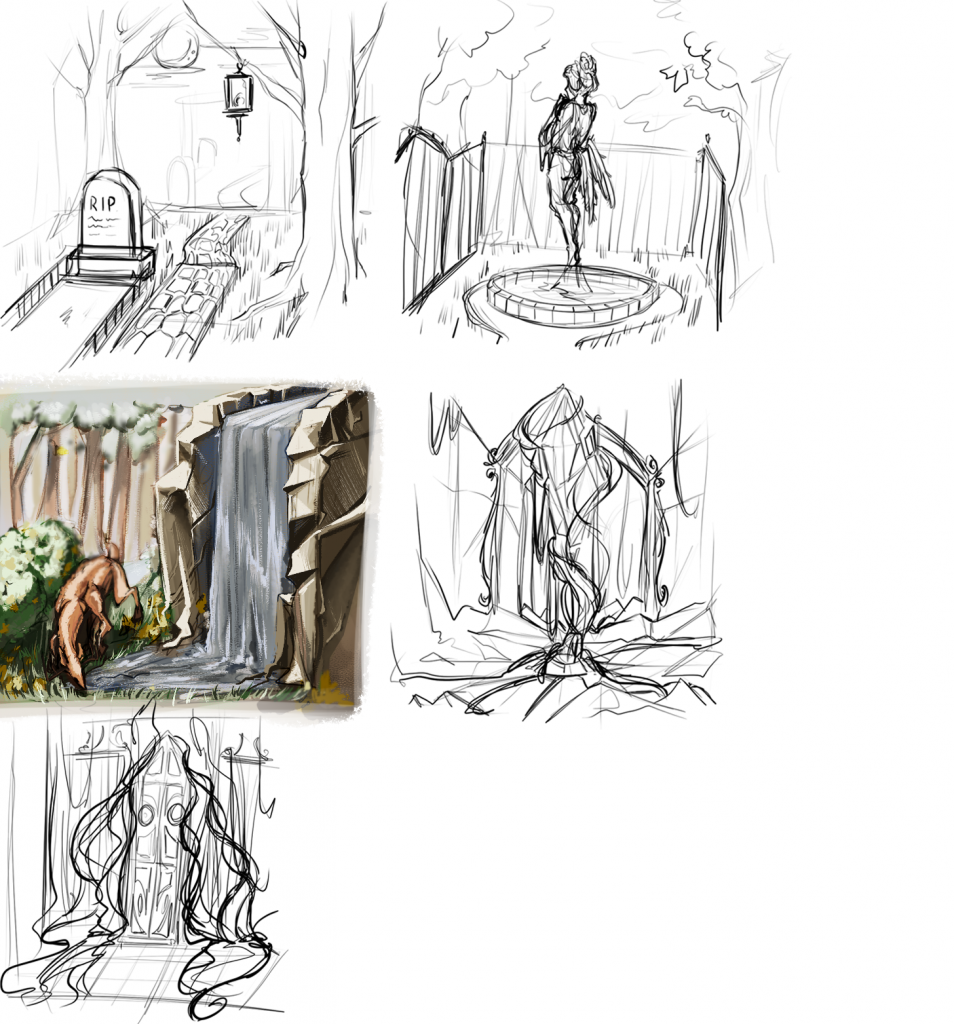
My first task was to complete 5 rough dioramas, with 1 being fully completed for the most part. I have designed many different types of dioramas, and wanted to go in a different direction from the 2d project half.
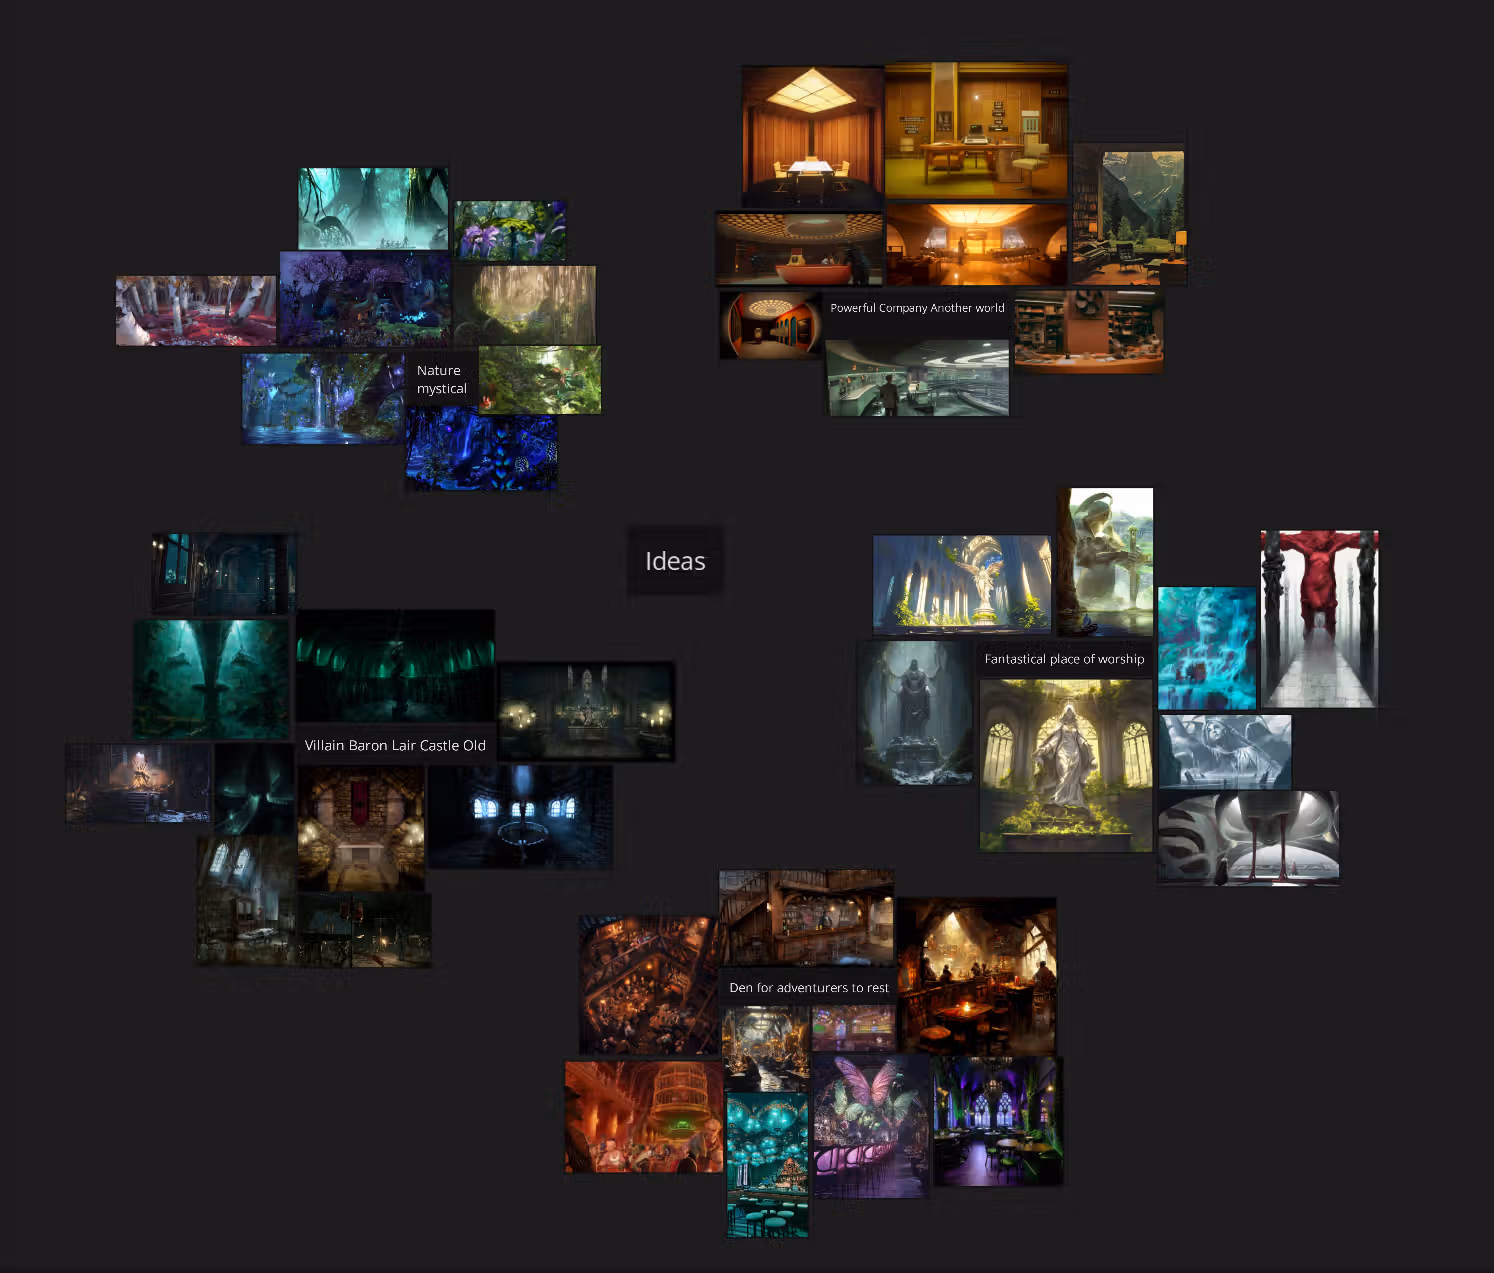
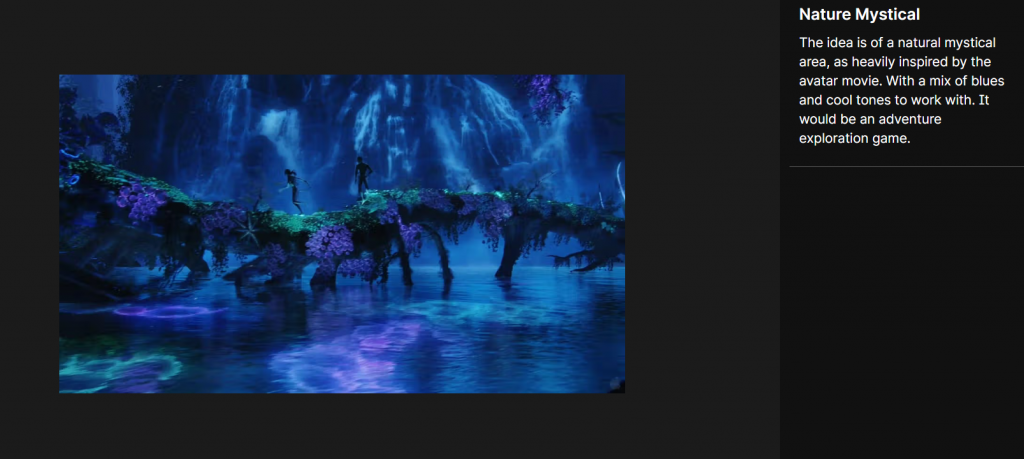
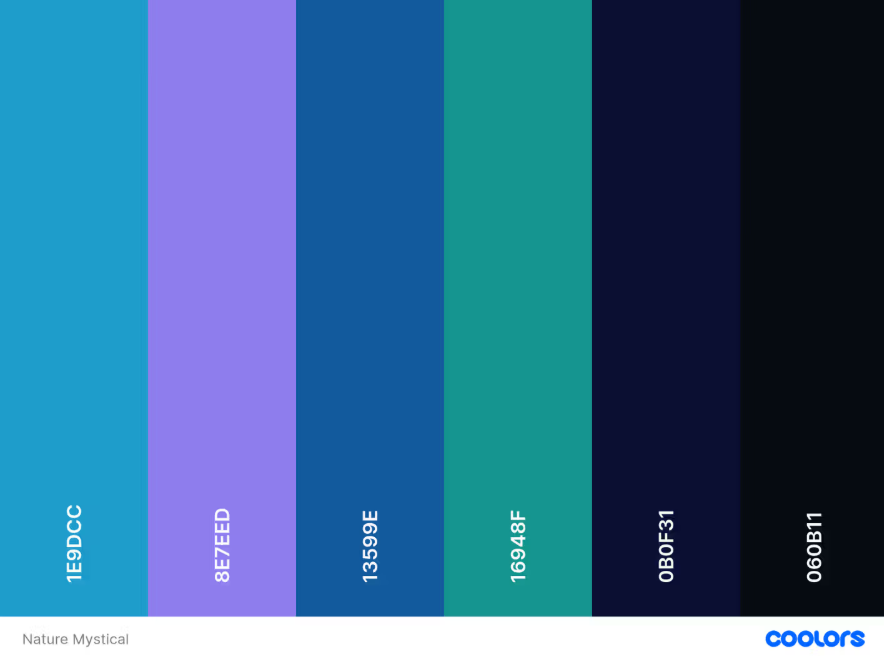
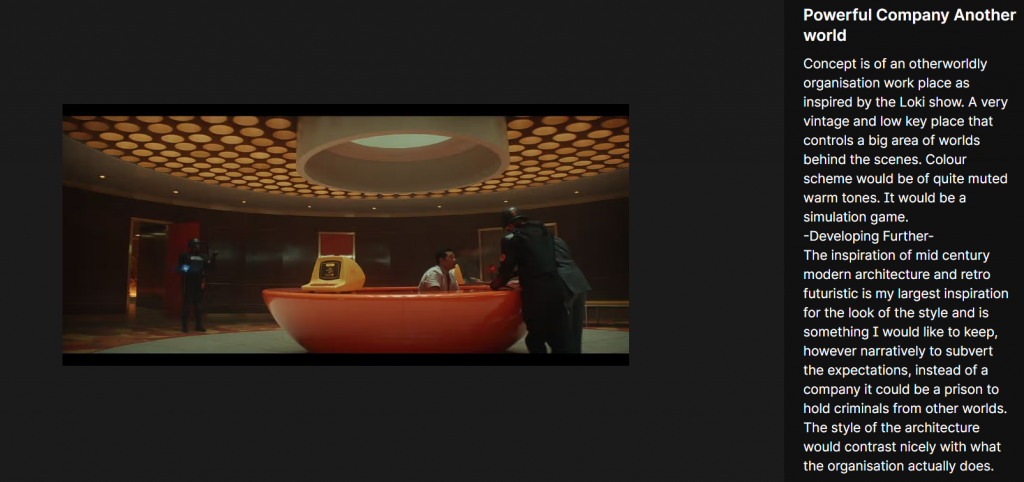
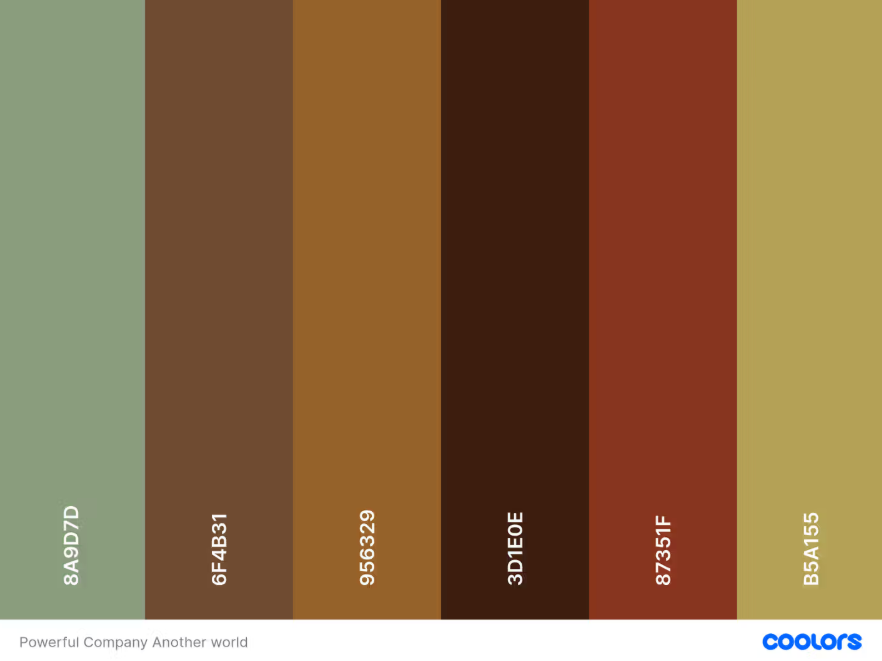
I have developed 5 ideas by gathering visual evidence and inspiration, and colour palettes, and the developing these ideas into a short explanation and narrative, as well as general information such as the genre of the game. I also picked out two themes to work from and tried to develop them further by subverting ideas and how they would work like narratively and visually.
Besides this, on our first day of 3d project, we also have received a talk about library and the services their websites provides. It was a very beneficial talk and showed me a lot of references I could work with.


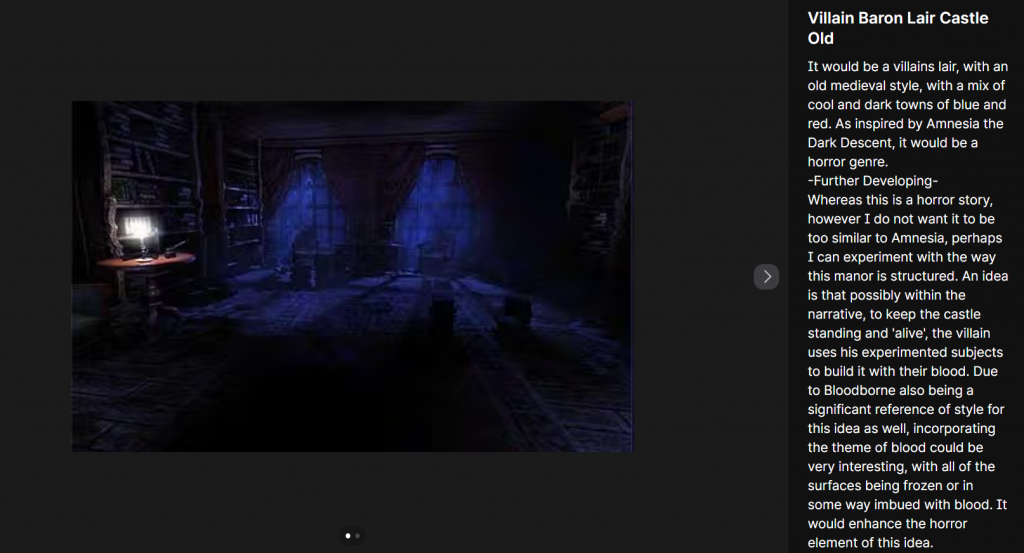
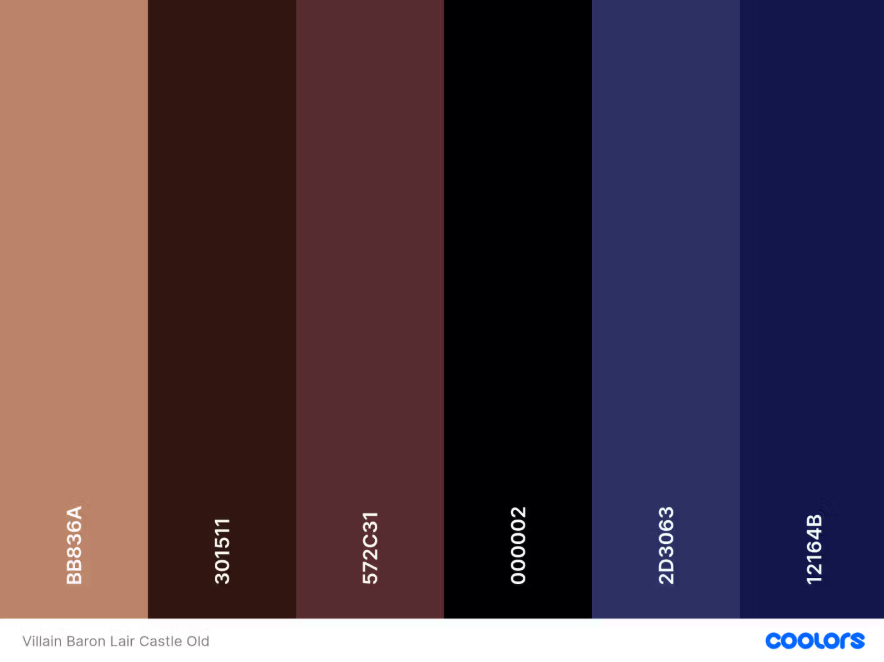
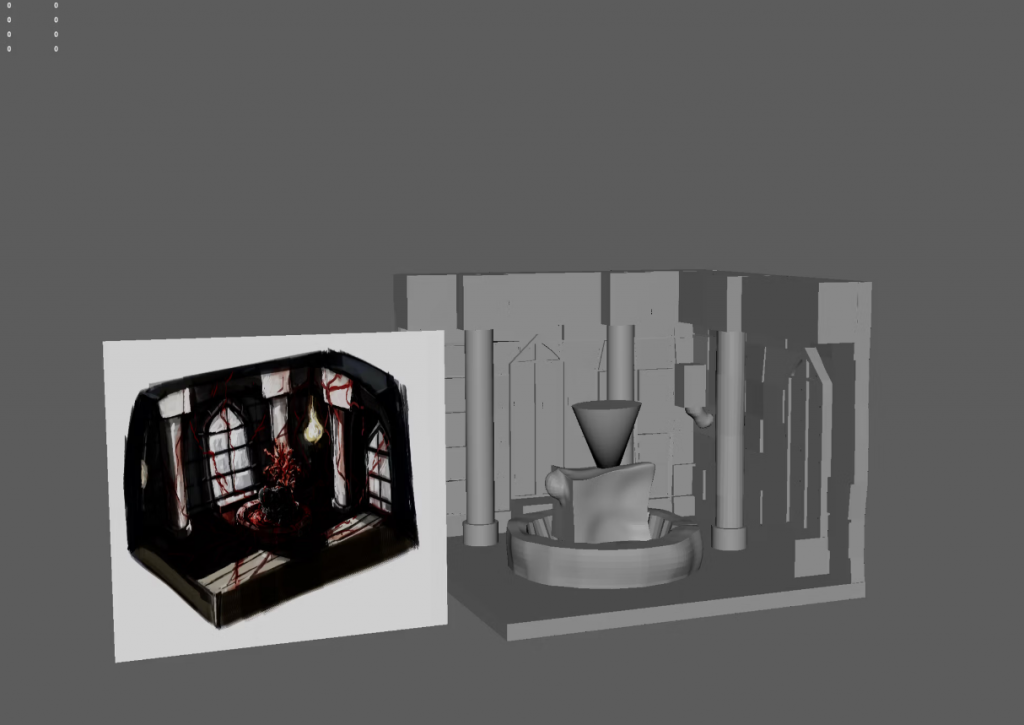
I have decided on two benchmarks from my two most favoured diorama themes, and from then have decided to go with the first concept of a medieval horror villains lair moving forward.
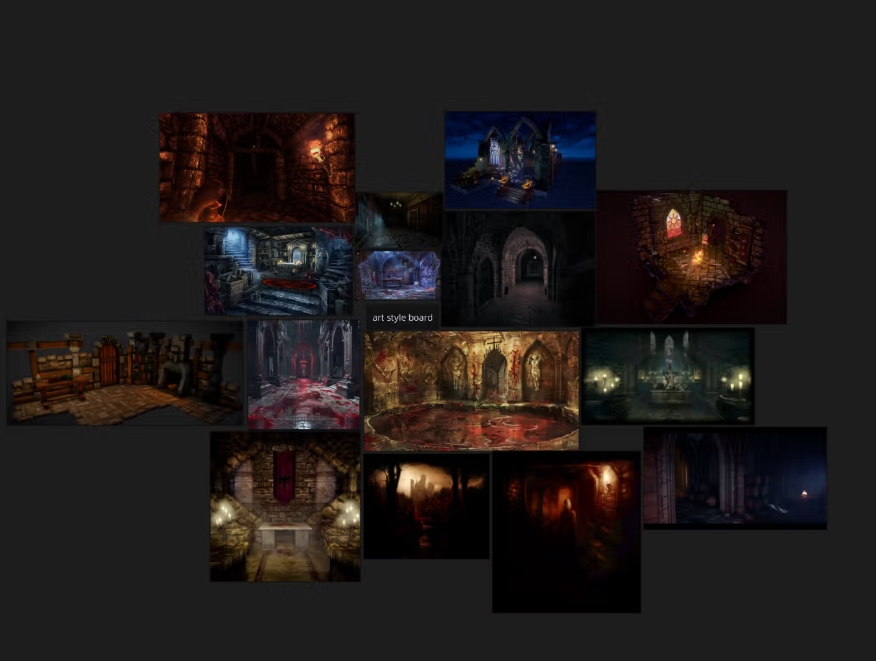
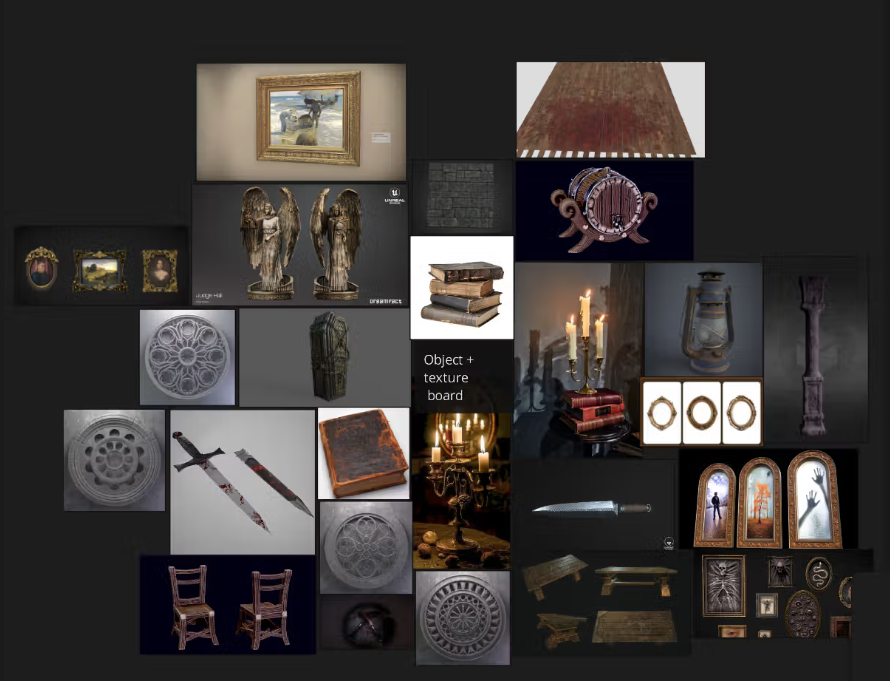
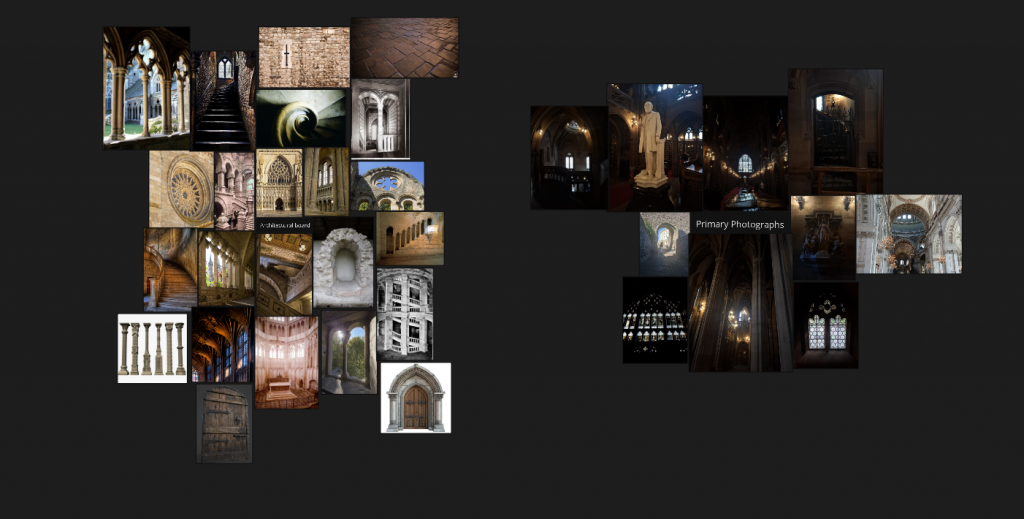
From then on I made three boards, an art style board to get inspired by in style, architectural board including primary photographs and an object/textual board to work on from when designing my concept sketches.
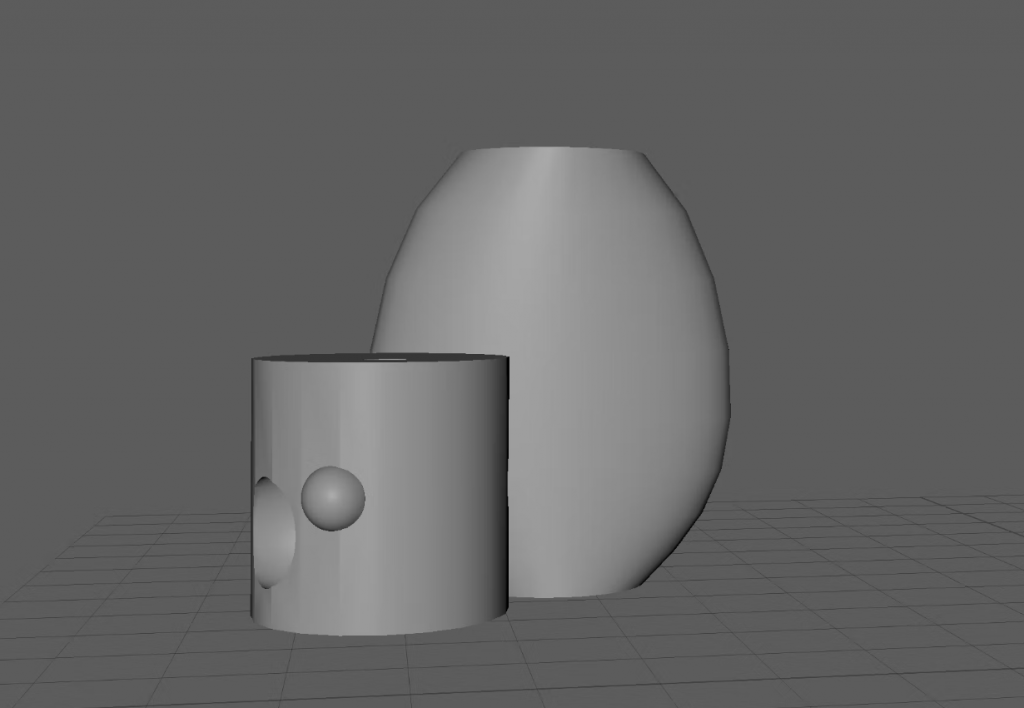
I have experimented and learned how to use maya basics such as put down shapes, rotate them, move them around, and resize them. In the end it was successful and quite fun to learn how to use it.
I wrote a narrative of between 150 – 250 words to describe the overarching story of the environment and help develop it further.
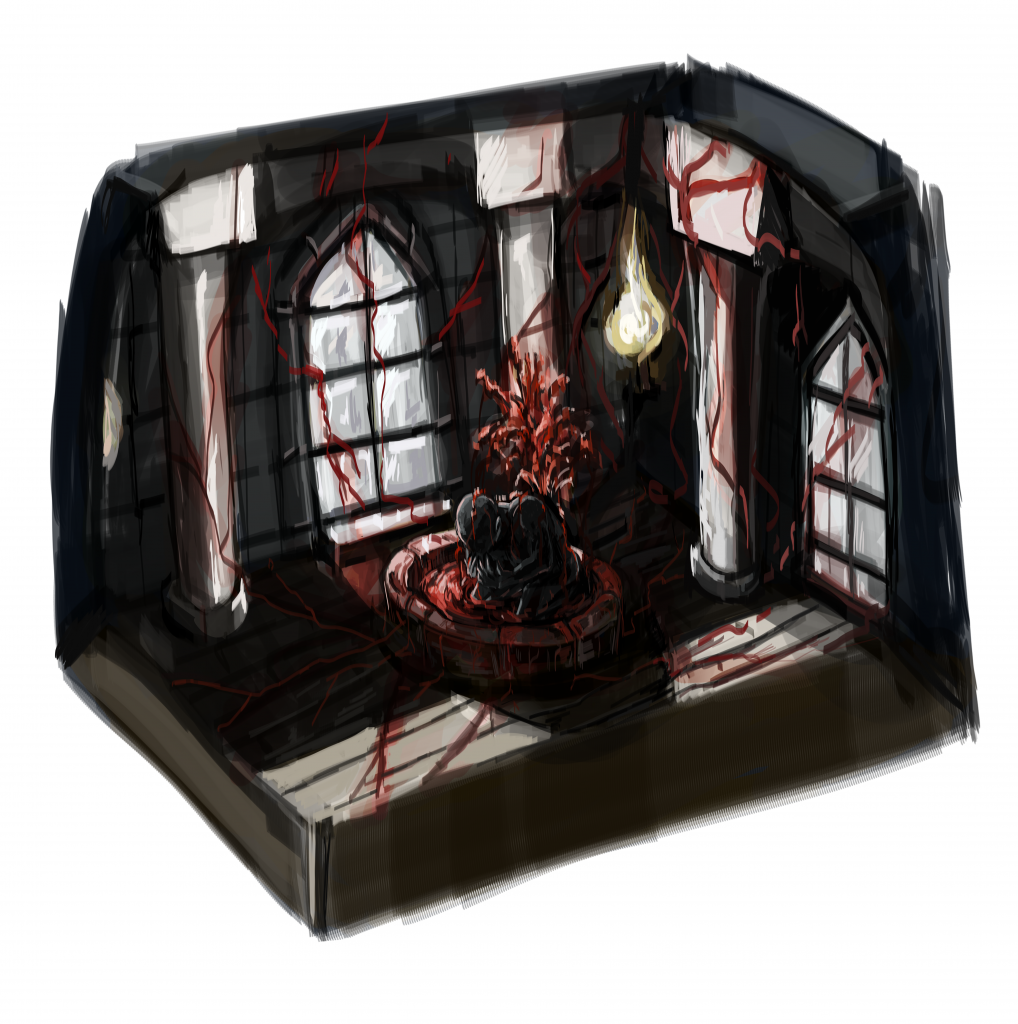
The story follows a criminal that wakes up in a cold manor, almost aching to a castle. Confused as to how they ended up there with a fragment of their memory gone, they start to explore the building and learn about its origins – an owner of this place that brings in unlawful people like criminals to serve justice, however in actuality experiments on them and uses their blood to feed and evolve the place as if it were alive. In turn with all of the findings, they also start to regain parts of their memories and how they were in the process of robbing the place to try and survive.
The walls are imbued with blood and victims of the owner’s failed experiments, as the halls are guarded and surveyed by the experimented victims that are now fully under the baron’s control and tasked to capture them. As the protagonist surveys the area and tries to find a way to escape, they eventually reach the ‘heart’ of the manor, where the owner is located, and the protagonist tries to defeat them and survive, as well as avenge all of the victims that have fallen under the actions of the antagonist.
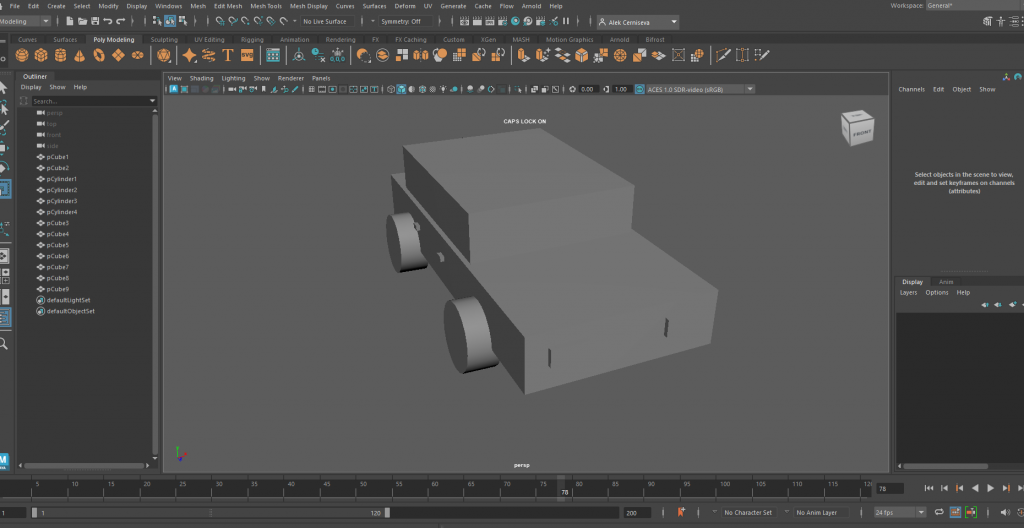
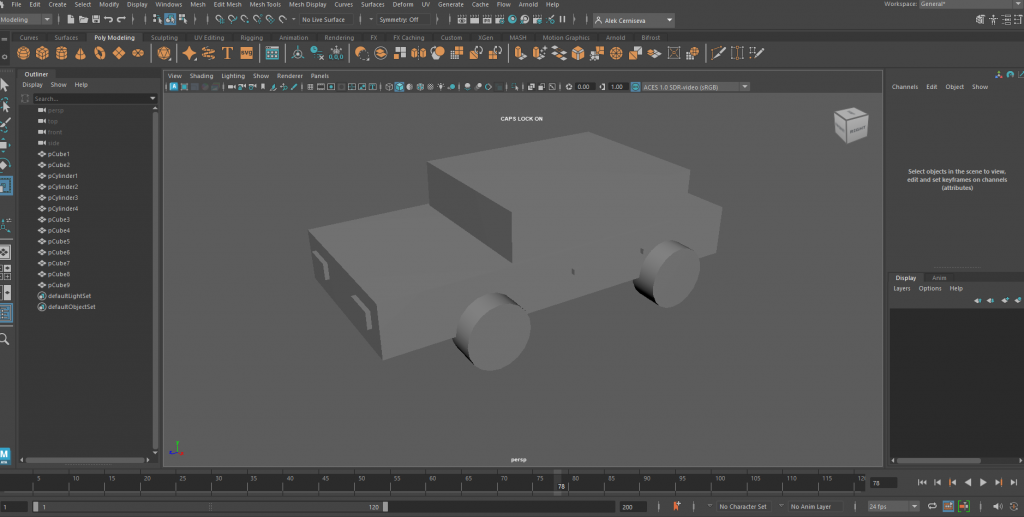
I have practised Maya by creating a car using all the knowledge I have gained thus far. I used the link provided on our padlet to install maya and so far it is fairly comfortable to use,
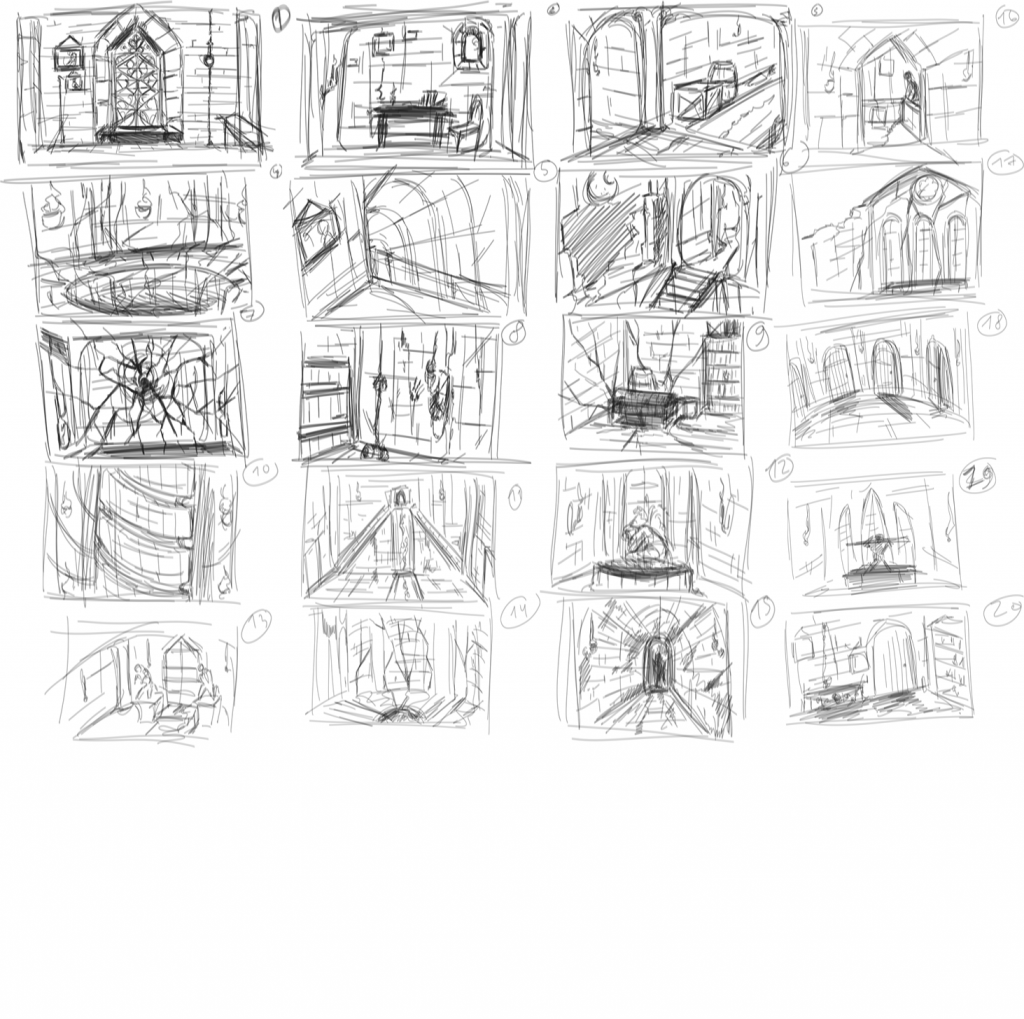
I have sketched 20 designs to then pick one from them and develop it further. For advice I asked several for my friends and family, and they have advised me to do between 4, 12 and 19.
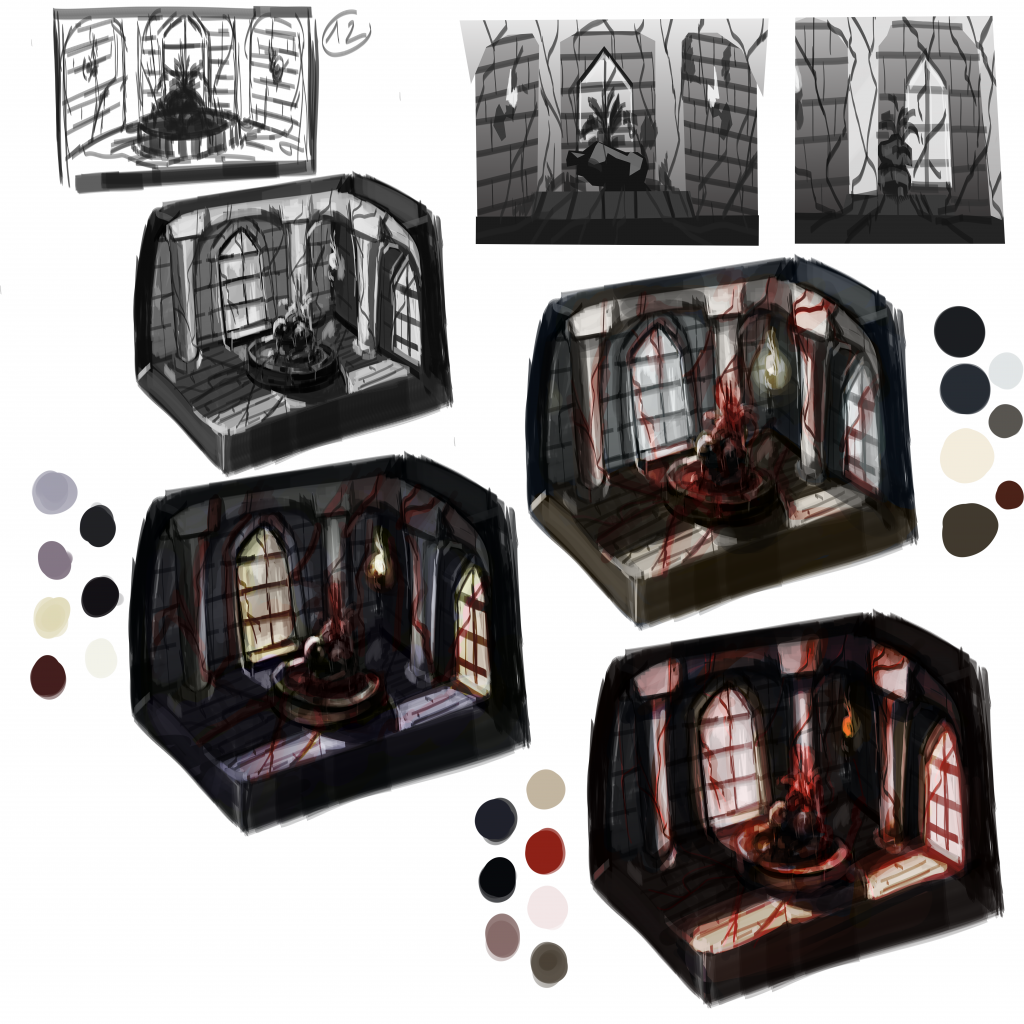
I have taken the 12th sketch and developed it into a thumbnail. Experimenting with colours and values then aided me into deciding on the finalised colour scheme and overpainting into a final rendered piece ready for the 3d development.
I have developed a final rendered piece, combining different parts of the colour variations however primary sticking with the first option. I believe it is developed enough for me to be able to work from it and develop it into a 3d rendered diorama.
I have completed some further Maya practices by playing with extrude, vectors and so on. It was a very positively helpful session and aided me in understanding Maya further.
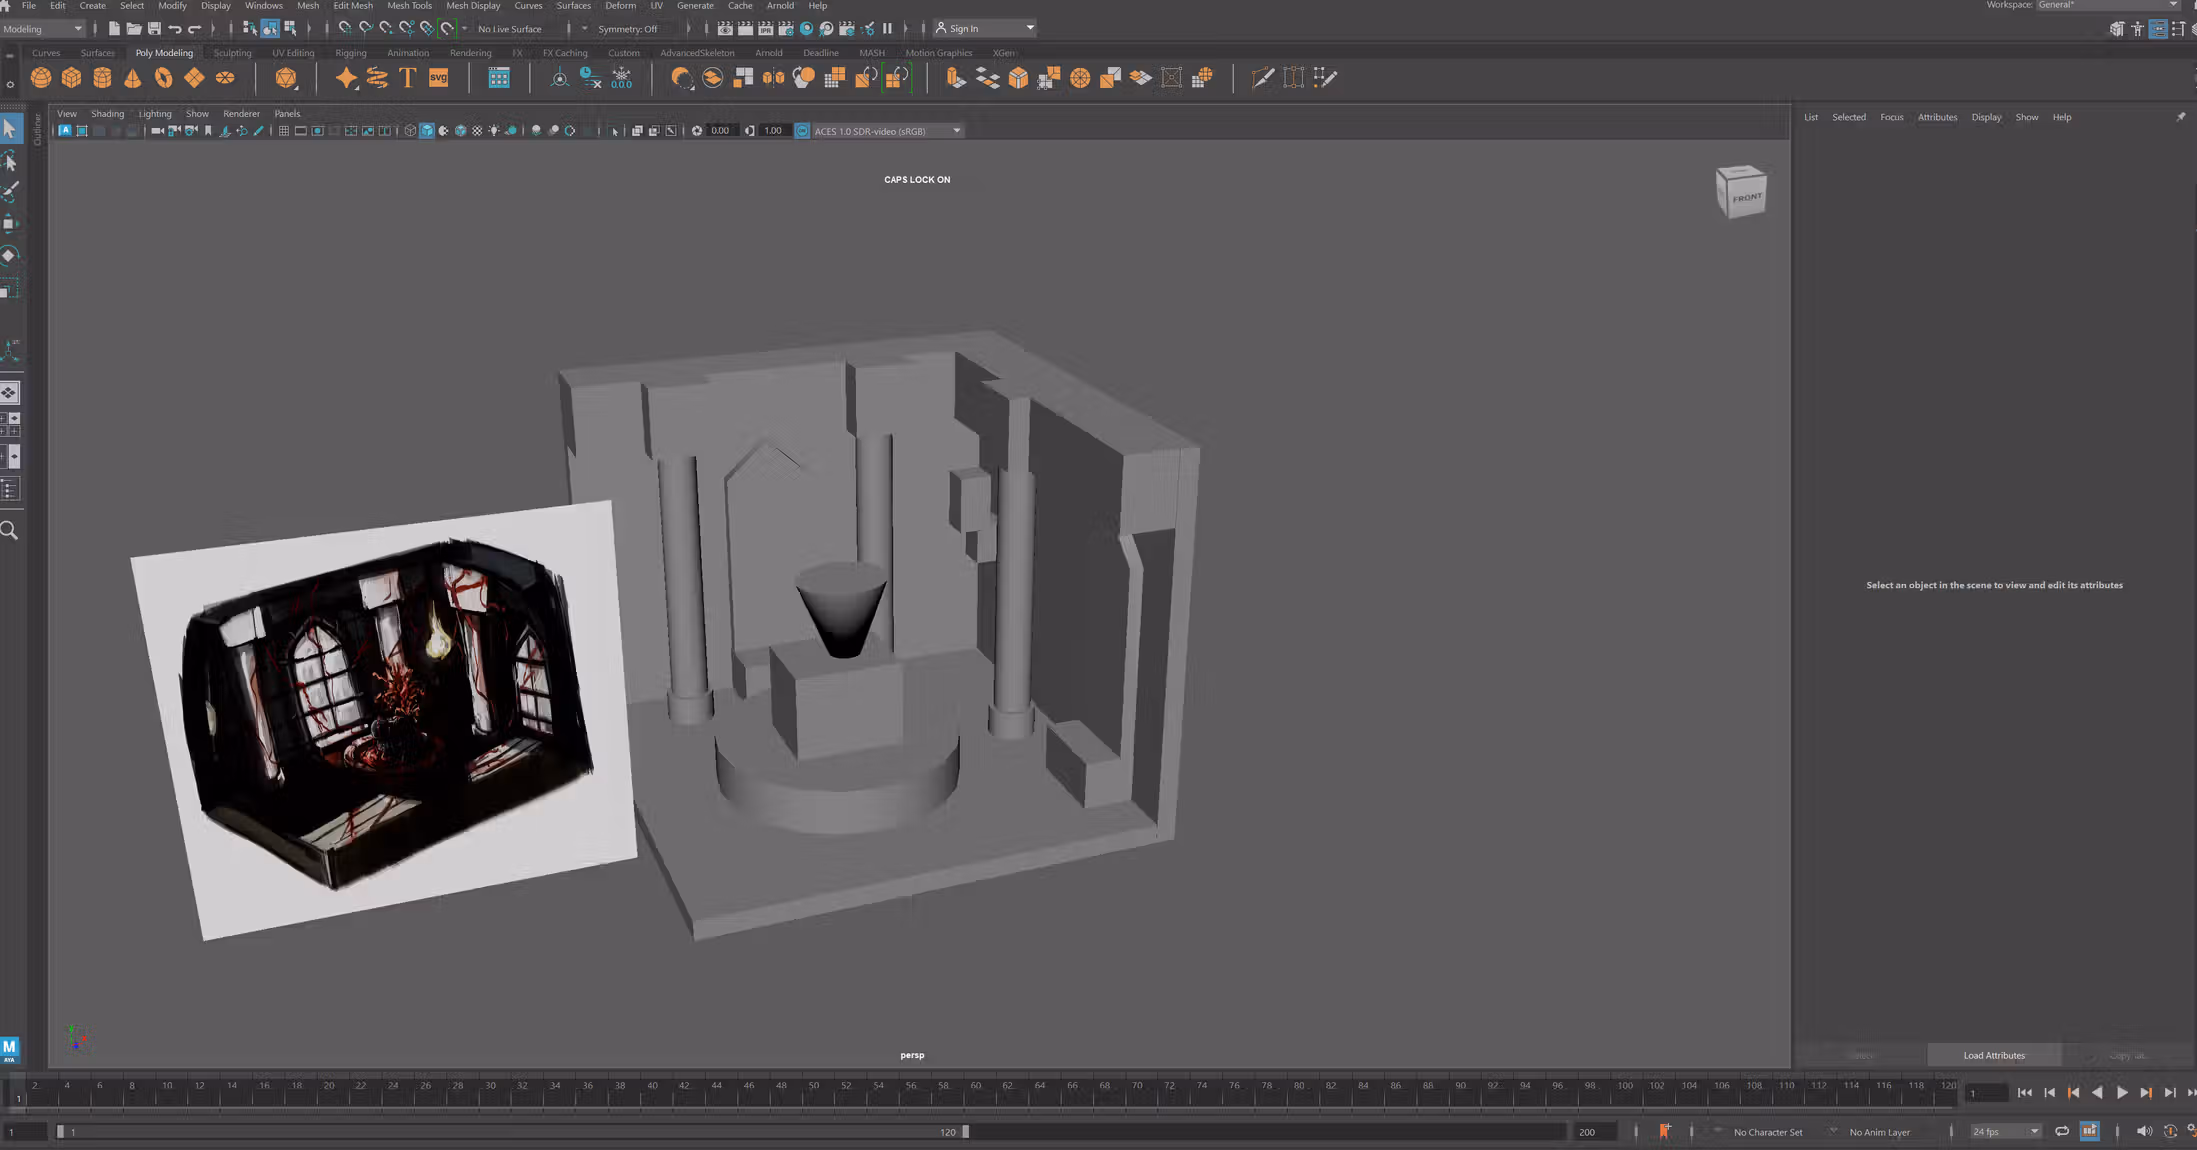
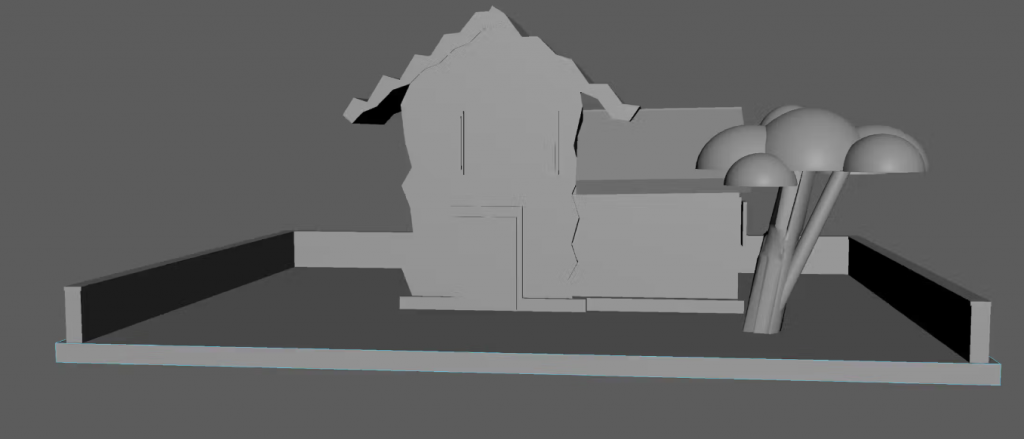
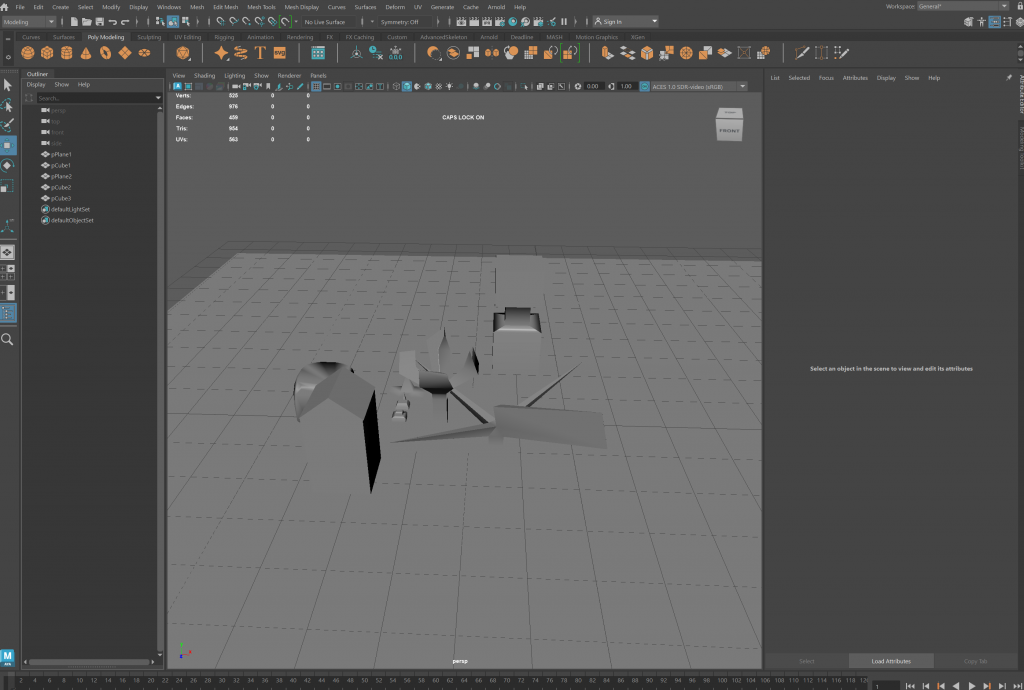
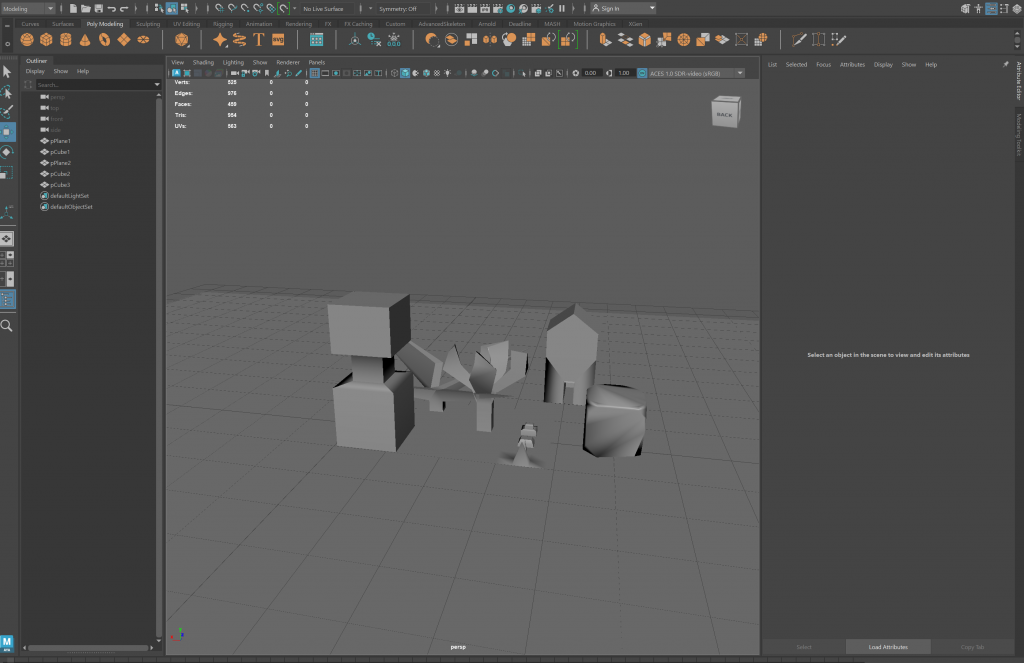
I have done a practise model of making a crate using maya, and then made a blackout of the concept art finalised piece I made previously.
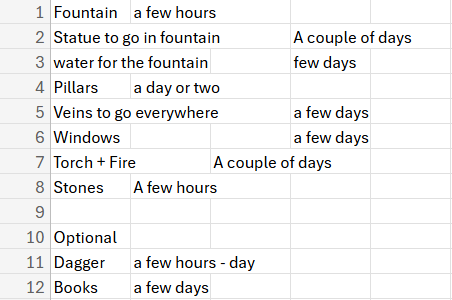
Current list of props to be made for my 3d diorama.
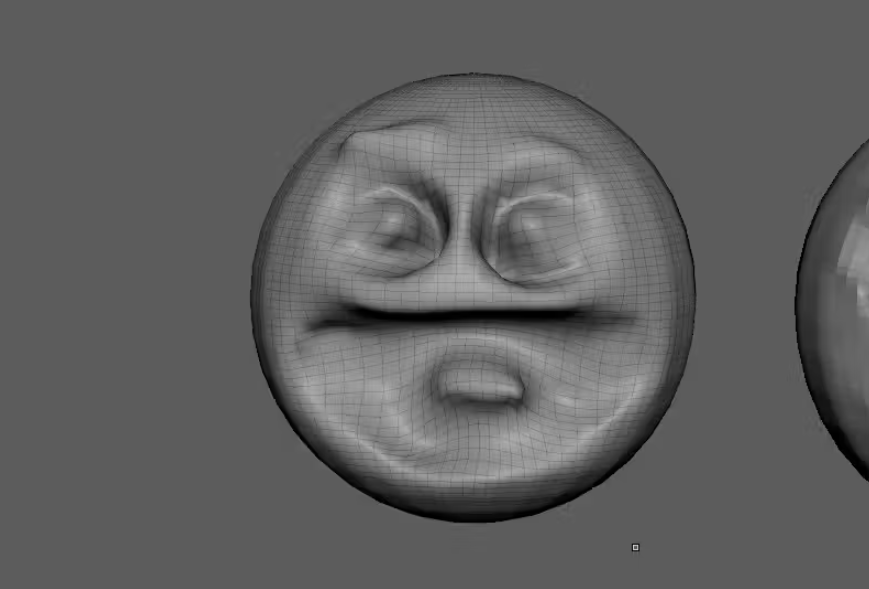
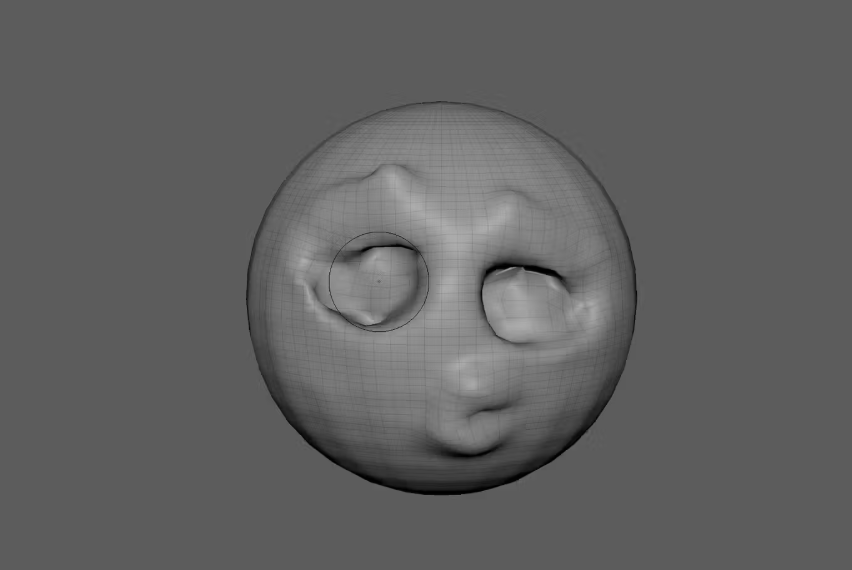
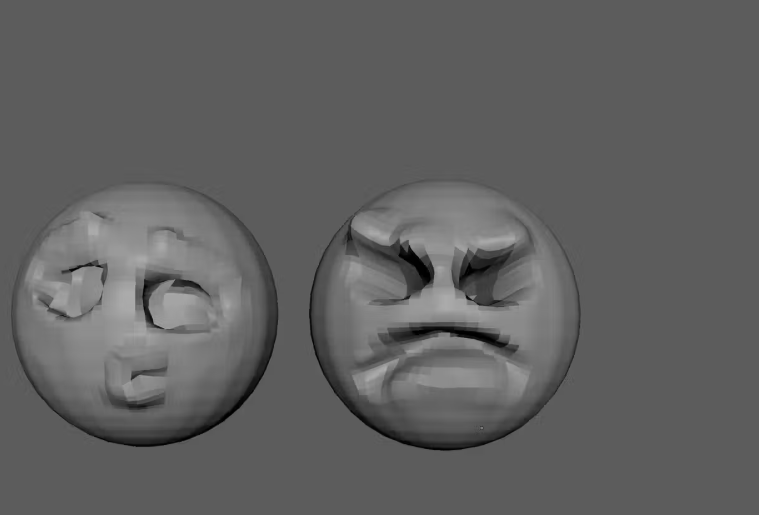
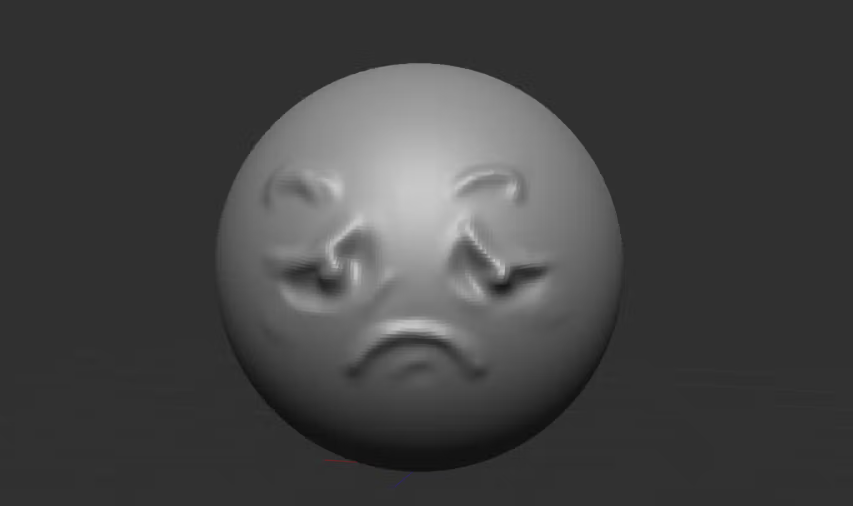
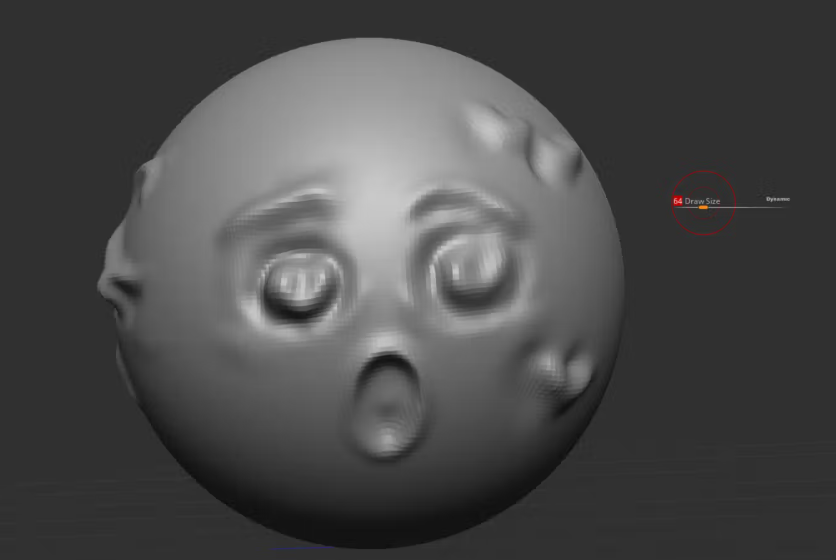
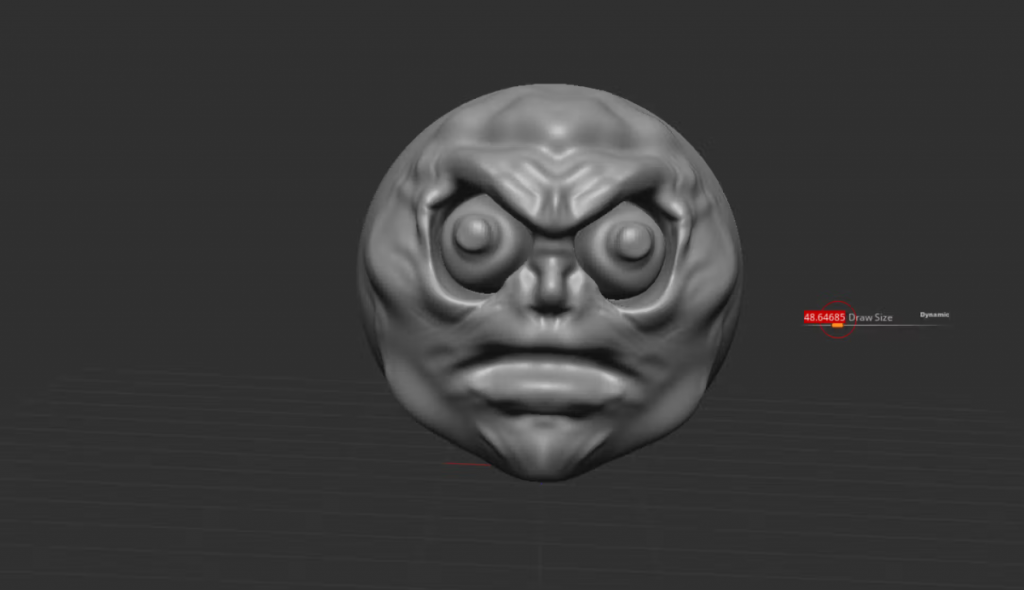
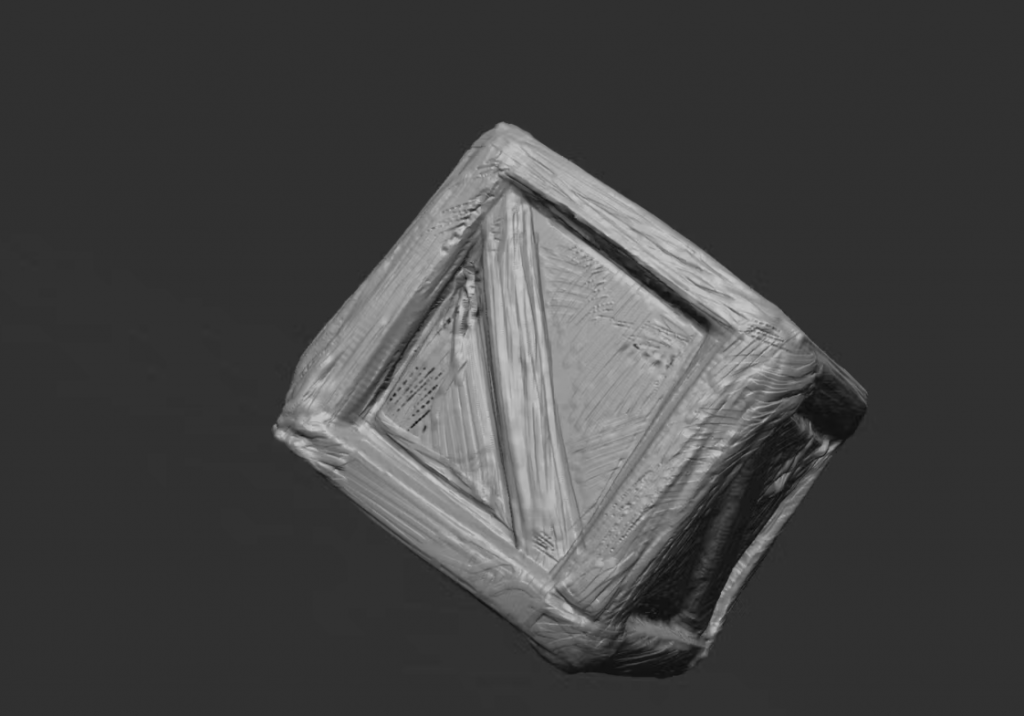
I practised using Maya and ZBrush to make emoji expressions and a crate. In the end it was a successful and beneficial practise session as I got to practise sculpting in both of the software’s and received some basic knowledge to be able to work with it moving forward. I believe ZBrush is way better when it comes to sculpting.
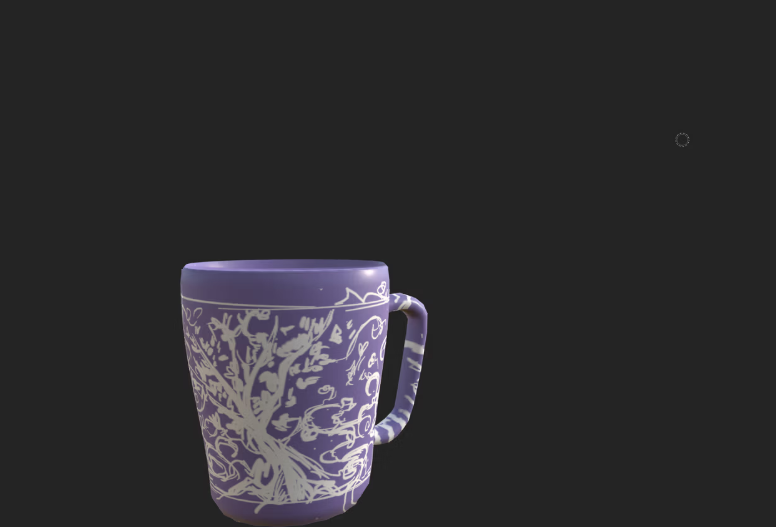

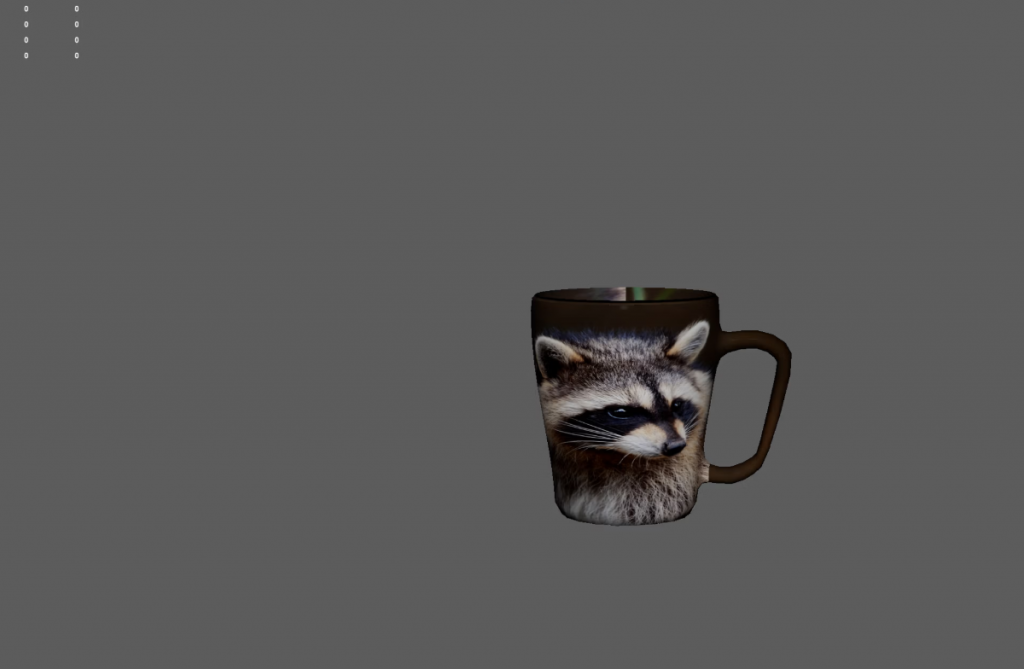
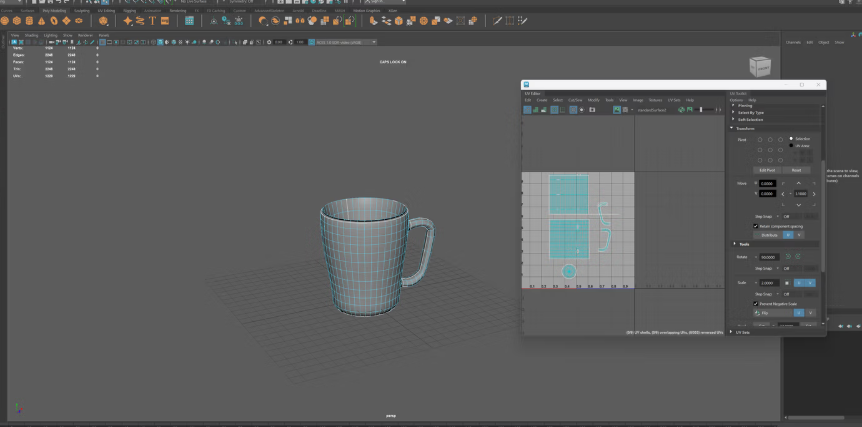
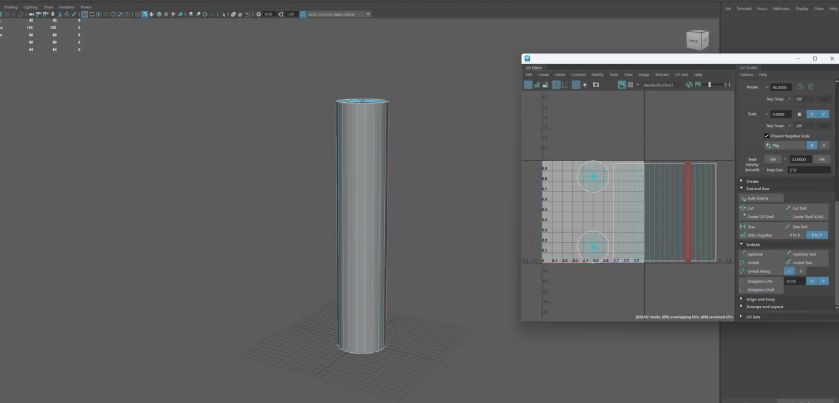
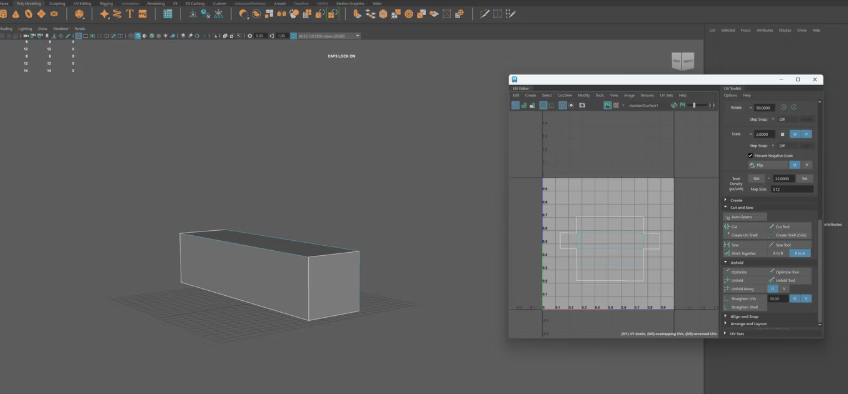
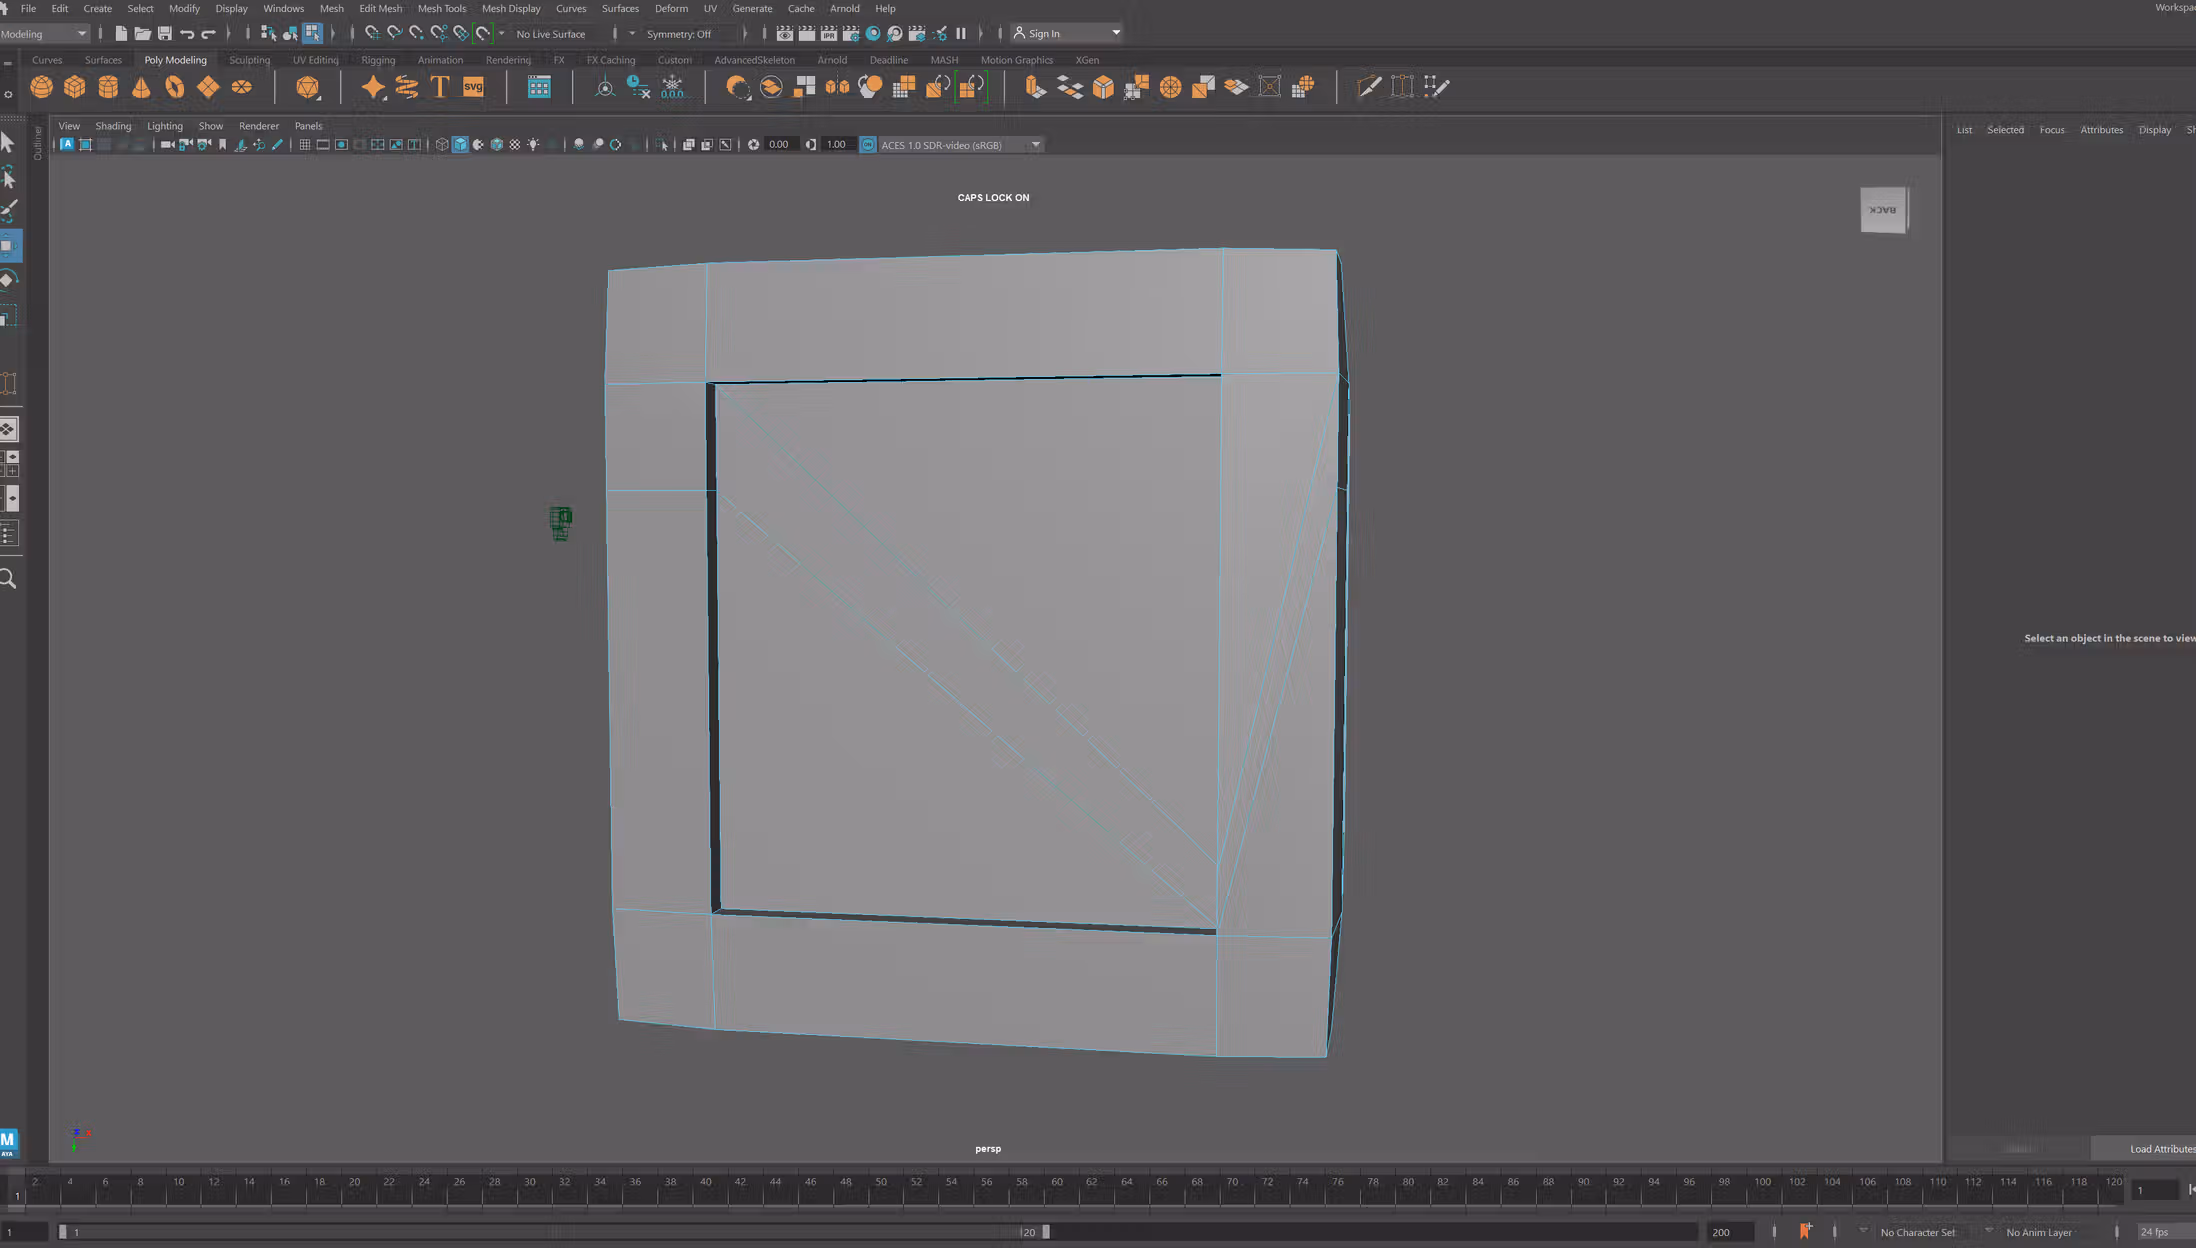
I practised using Maya and then making UVs. From the UV I then imported an image on top of a cup since it should work reasonably well then with the correct UV. Afterwards I also practised customising the cup in substance painter and drawing a design.

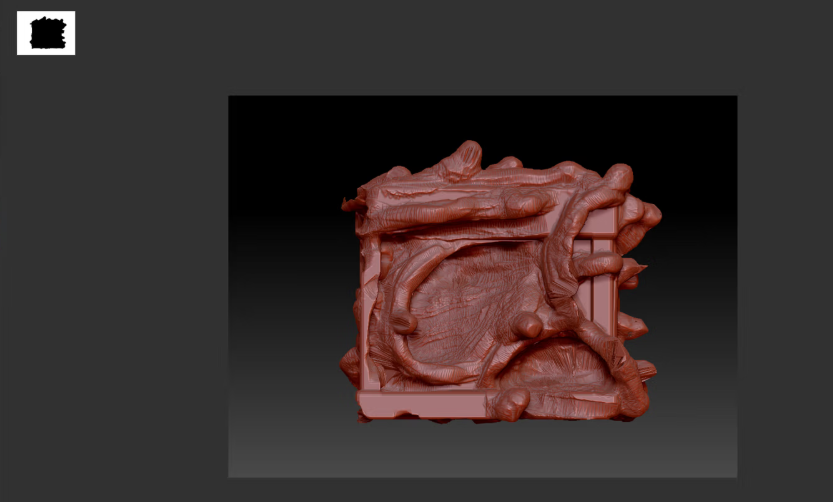
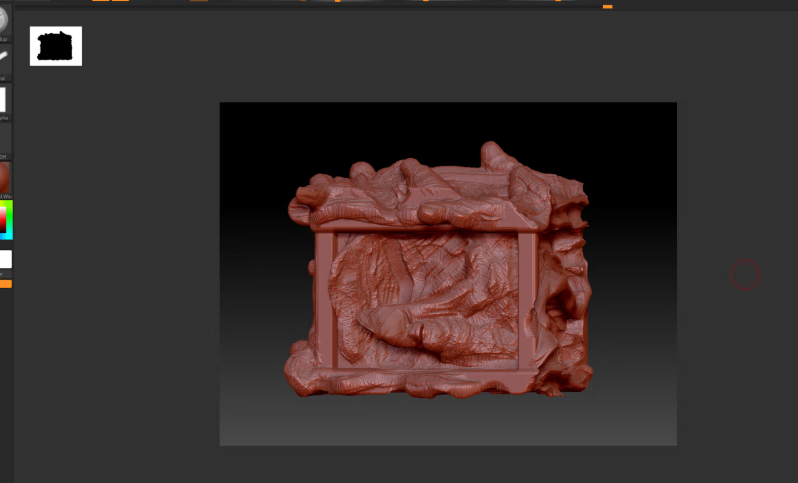
I practised rendering a cube, and tried making a statue for my diorama in zbrush, however despite some very interesting shapes it created, it constantly broke and so I decided to first model it out in maya and only then go over it in zbrush afterwards. However it was nice to try out and experiment. I also practised importing models into different programs, by first taking a crate from Maya and using zbrush to model it to be more interesting, and then to substance painter to further develop it until it got back into Maya. It was nice to work on and see the progress I would need to do for my diorama.
developed model base for statue to be developed on in zbrush, and i also worked on the UVs for the rest of the diorama that I will not be modelling in zbrush. I am not entirely sure if the UVs have been complete correctly and will be returning to them at a later date.
https://youtu.be/EriiuMPx22Y?si=OWuRmV200vwUTMva https://youtu.be/psGbZF7xKV8?si=oeV6BI6bnV5tJF02 https://youtu.be/8-TMjuvzZEU?si=lg-iCgKlLwA_WbDC https://youtu.be/k1LygYsI17k?si=XDuDN8GnA8fr6AT2 I watched a couple of videos on UV mapping and how to do it correctly, and efficiently. They definitely helped me in refreshing my mind and looking back on the UVs I did to fix them.
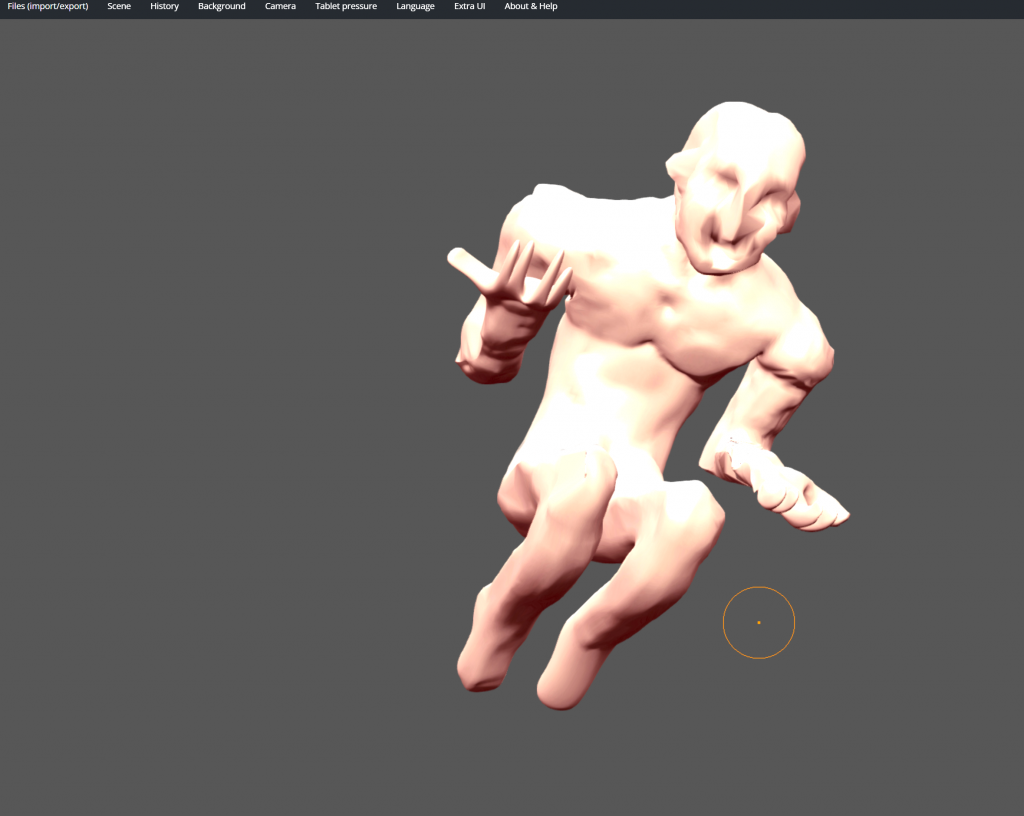
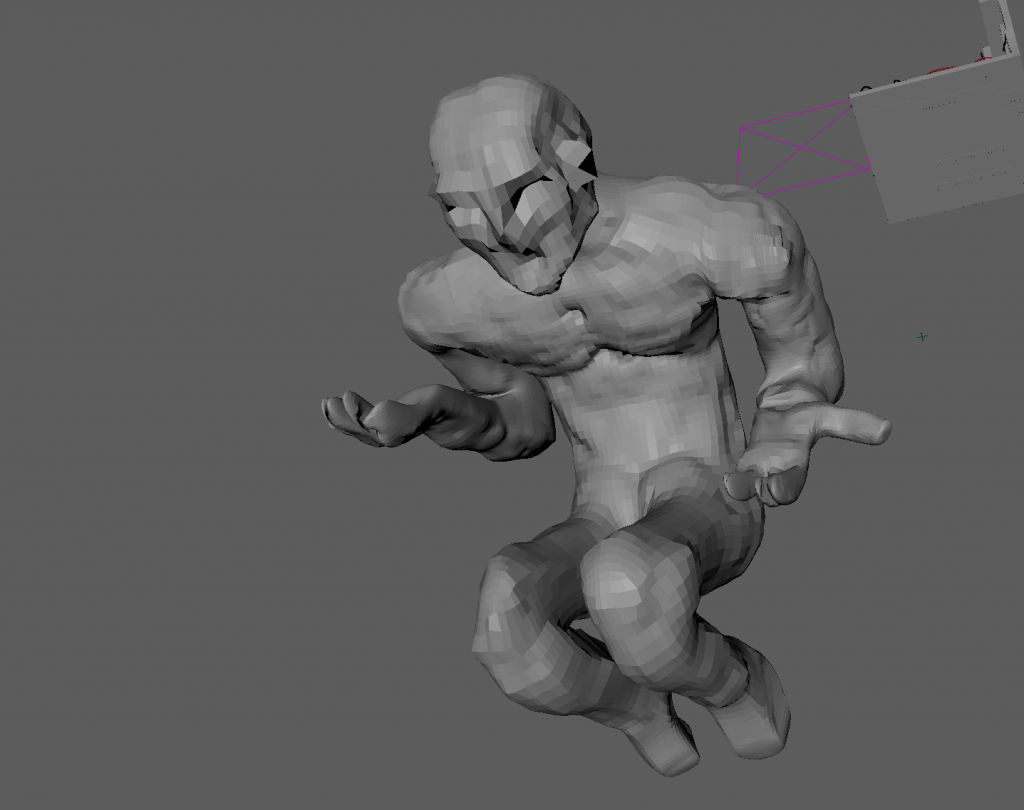
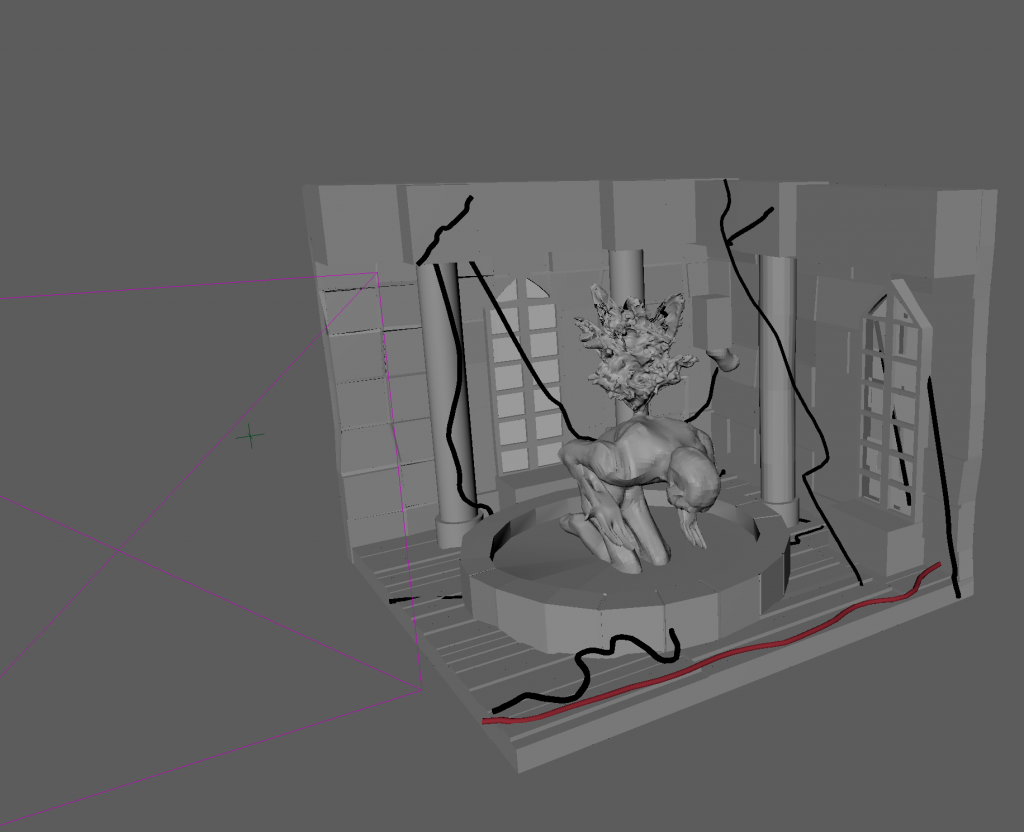
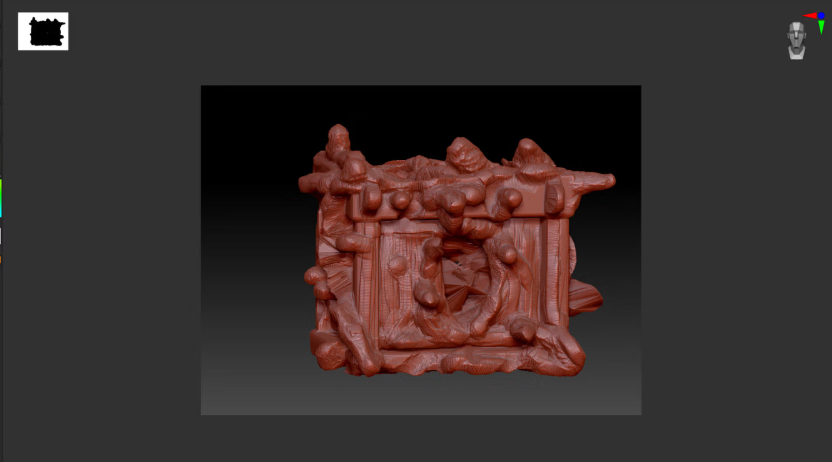
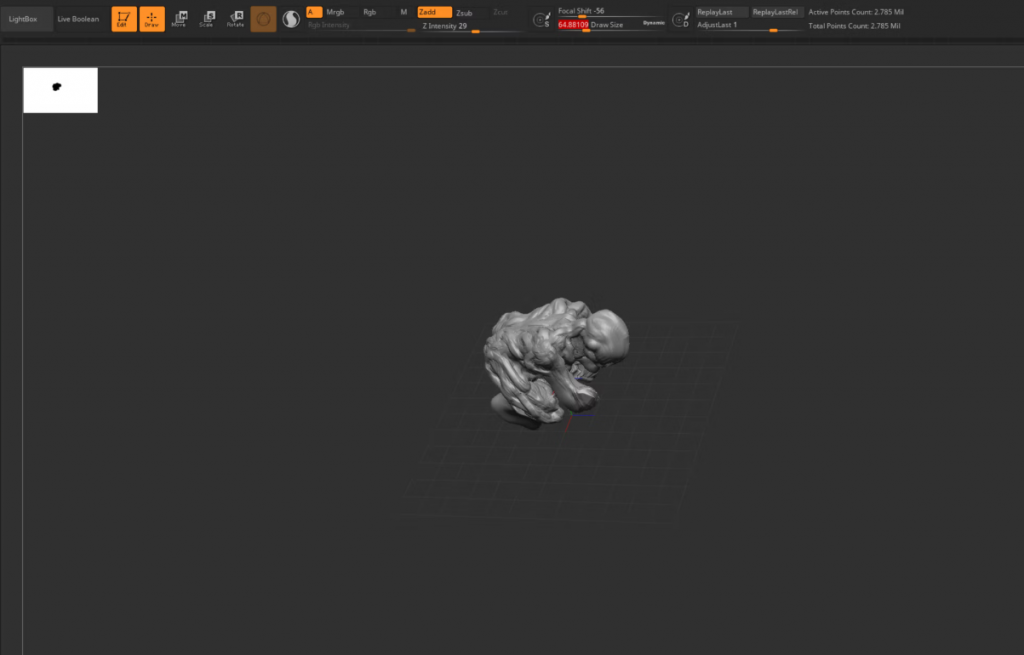
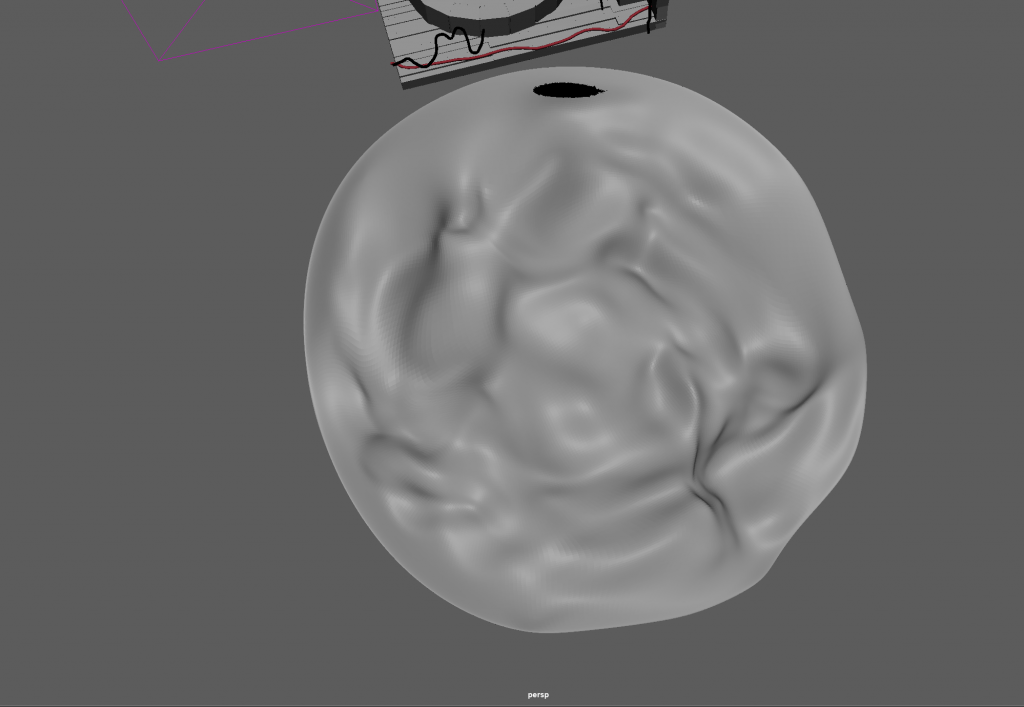
I had to stay at home during the first day of uni after winter break due to a pulled muscle in my back making it impossible for me to make it. I used this occasion to work from home using sculptGL and develop the statue of the fountain and water that comes from its back. This free online software is a nice alternative to zbrush when I am unable to use it at uni, nor at home due to how expensive it is. Next I will need to sculpt the water for the bottom of the fountain and the torch on the wall to get the diorama completed. While I struggled to use sculptGL, in the end I like how abstract and almost inhumane the statue ended up looking, since it fits the story of my diorama and its inspiration.

I continued to use SculptGL due to the fact that my back was still injured and I had to stay home. I sculpted the water for the inside the fountain, which I struggled with since the model kept breaking, however after playing around with the shape I have figured it out and made it look fairly reasonable. I also sculpted the torch to go on the wall.
I watched different examples of people sculpting water and fire to see how I should sculpt my own and on how to even get started on sculpting these elements. They were beneficial in allowing me to see different methods and outcomes, as well as how I can approach this myself.
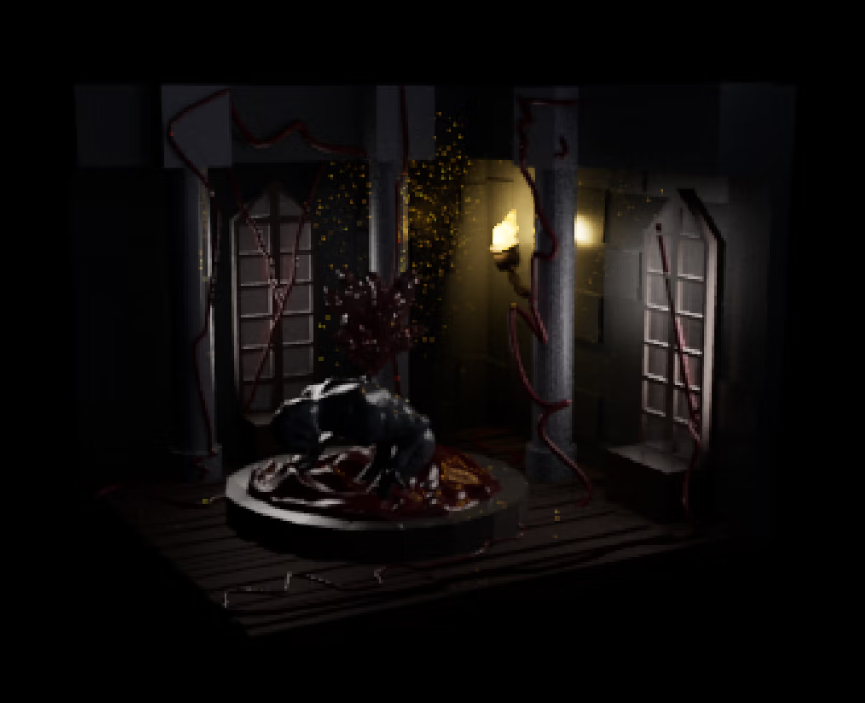
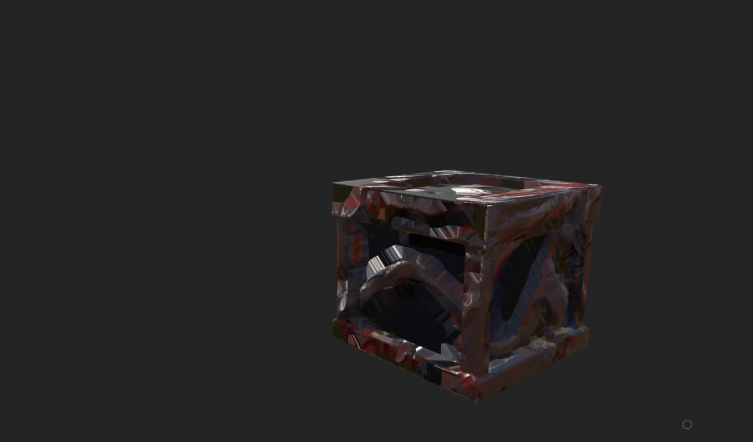
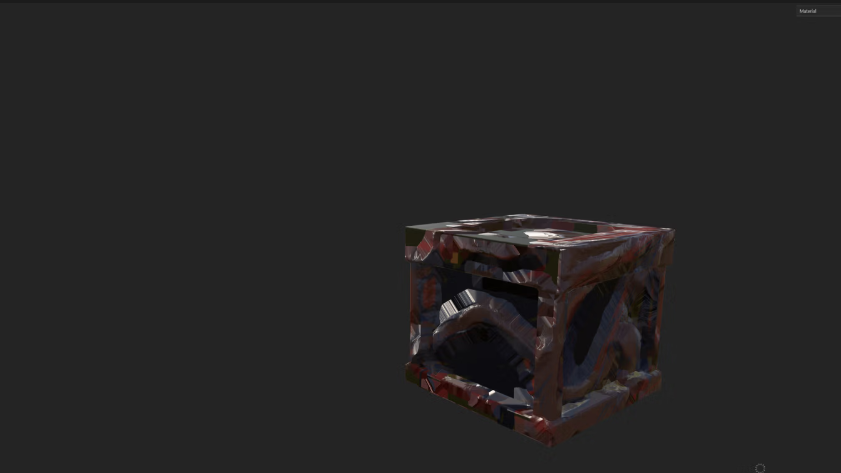
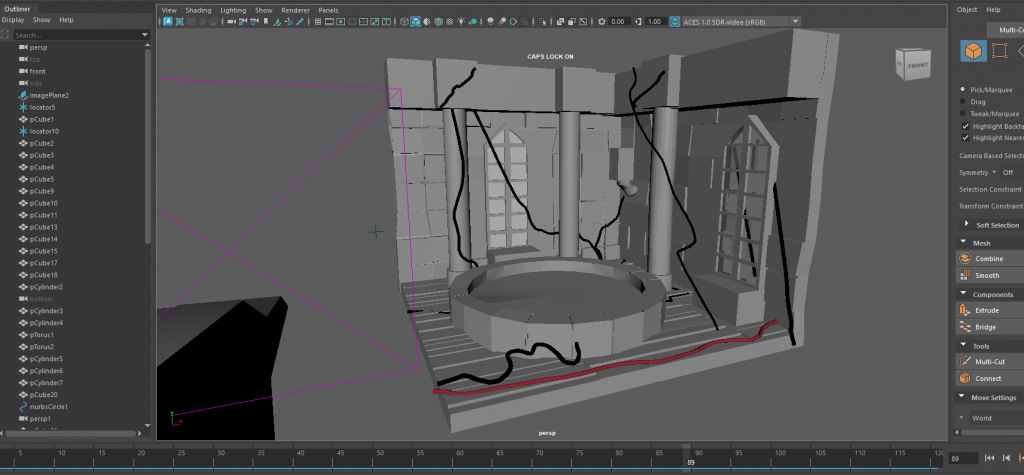
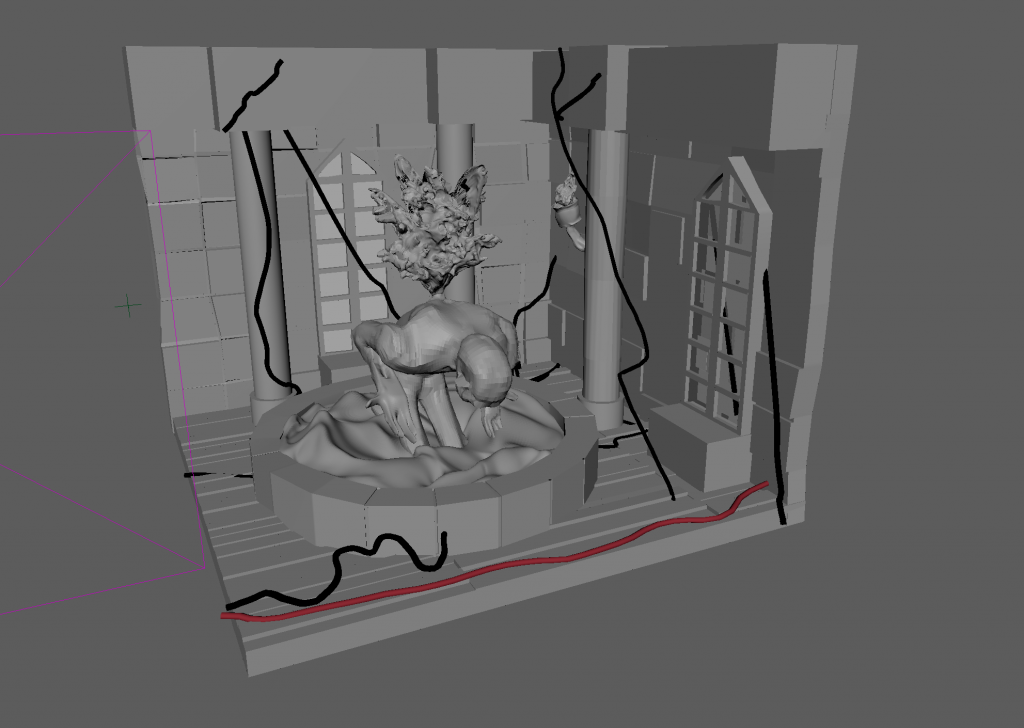
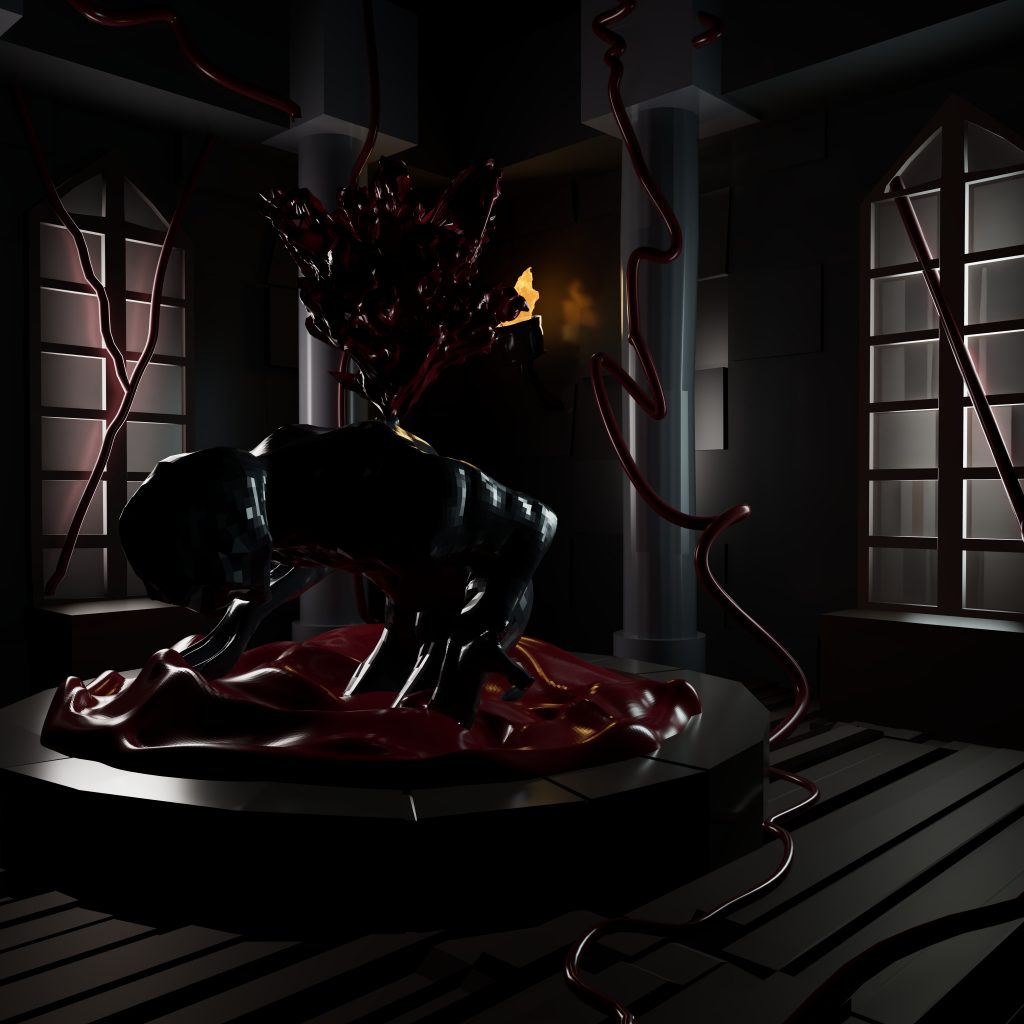
I fixed the veins in the diorama since before they were not coming through on the renderer. I used different tools such EP CURVE TOOL as well as sweep mesh to make variety in shapes when it came to the veins.
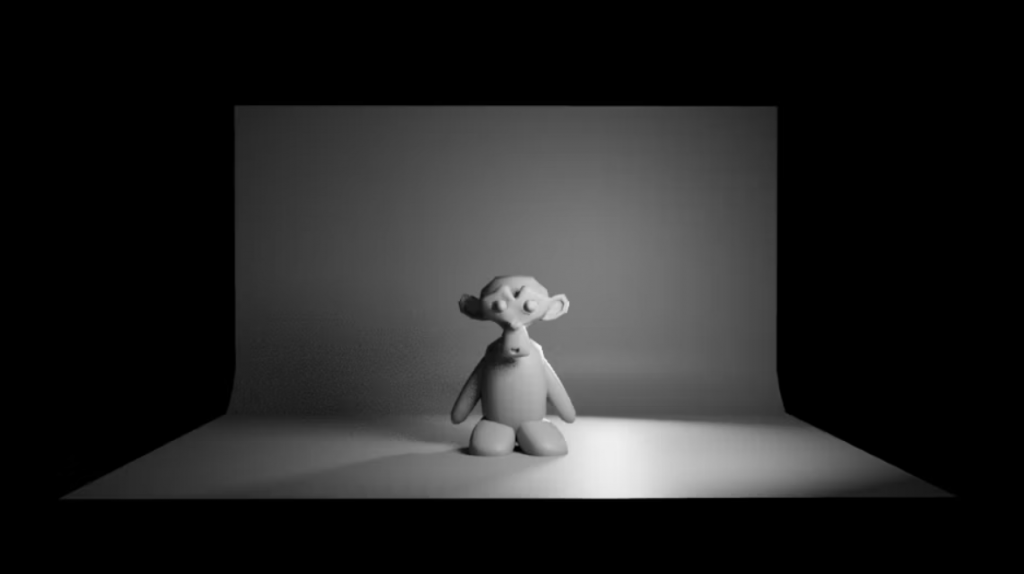
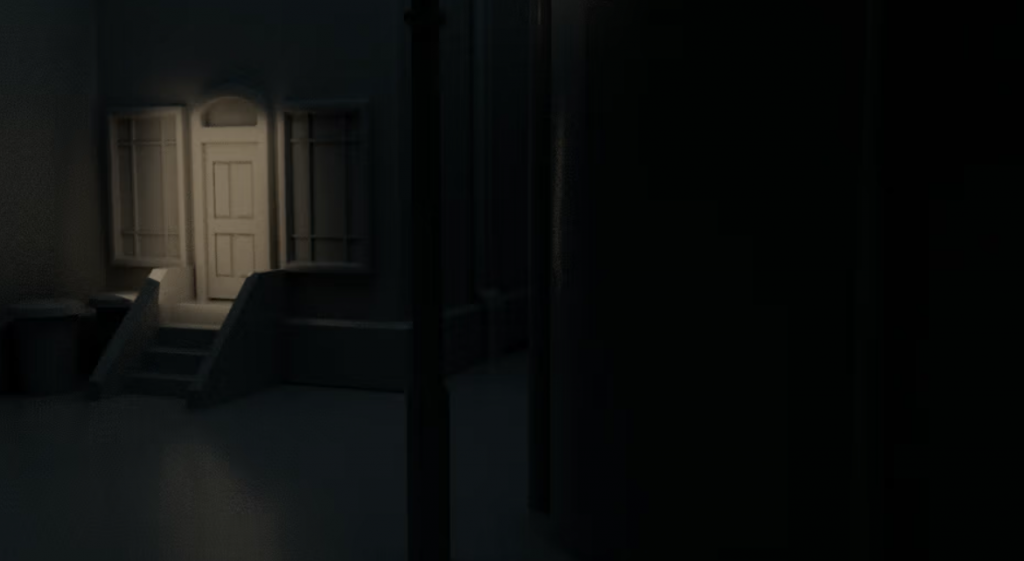
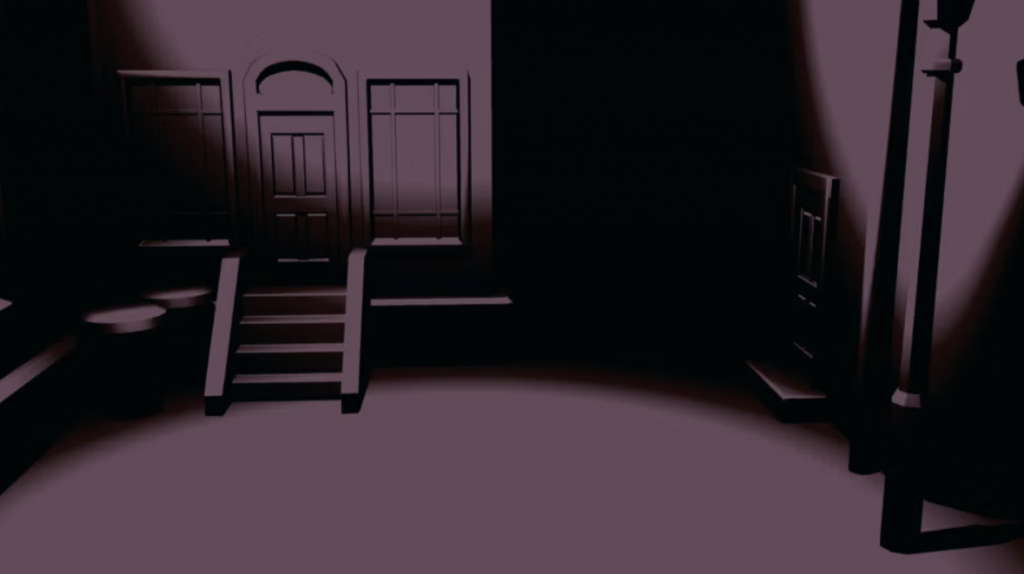
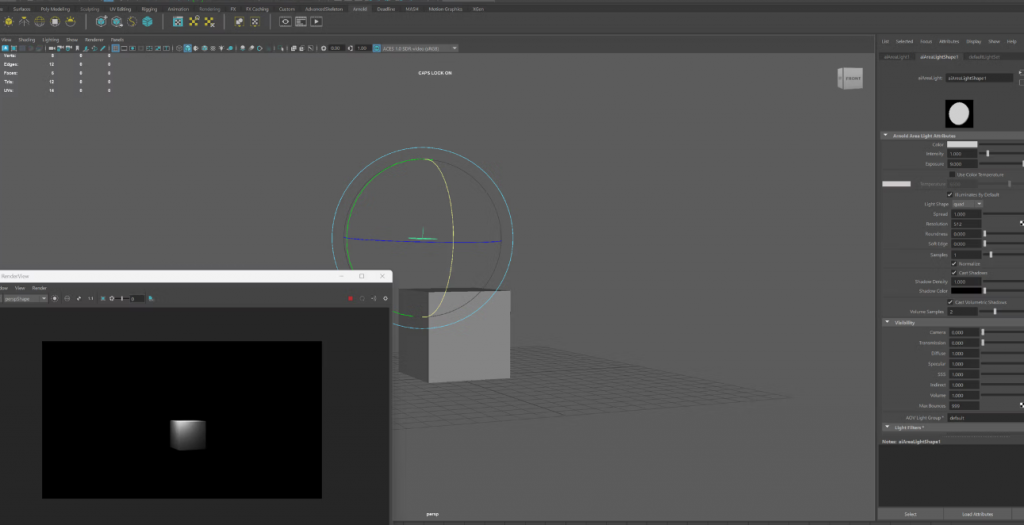
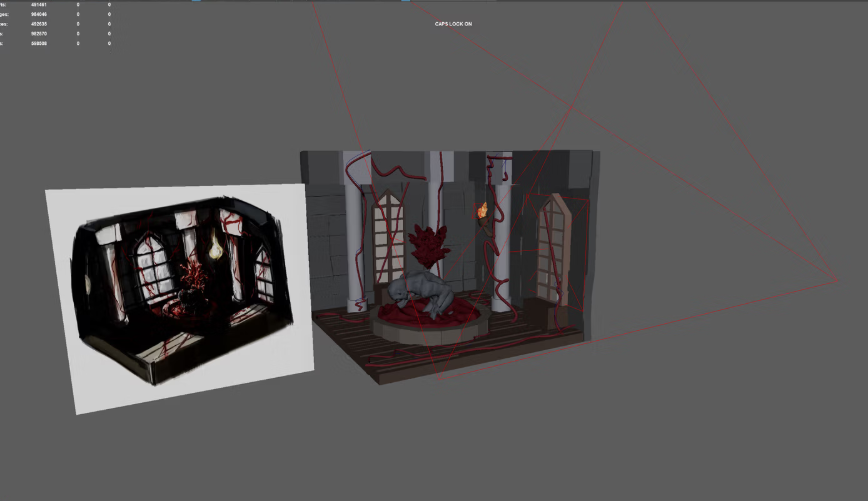
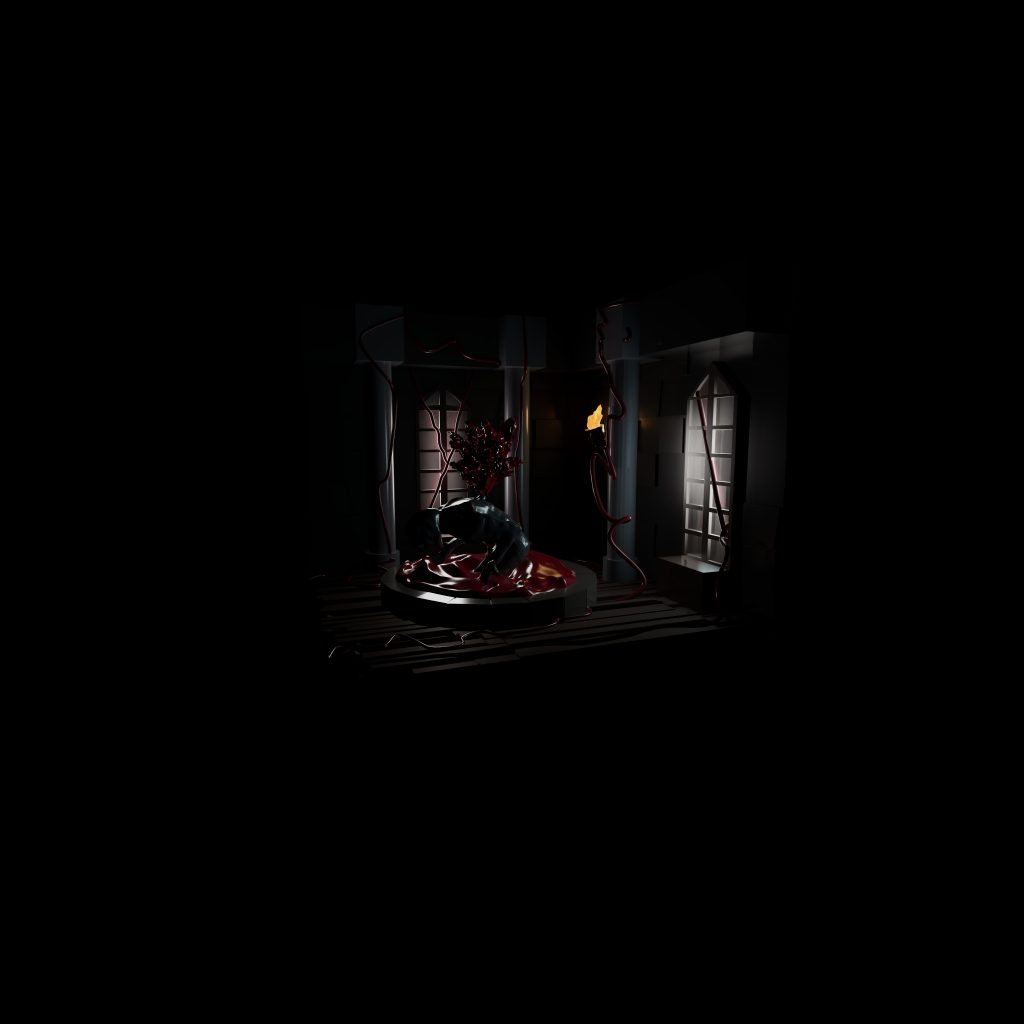
I have learned about lighting and how to properly light a scene, such as the use of the key light, rim light and back light. I also learned how to do Toon lighting all using Maya, first a model of a monkey and then of a town after choosing a centre point. Now that I have gotten knowledge of lighting properly and rendering correctly, I will fix some stuff in my diorama and get it ready for texturing I will do next.
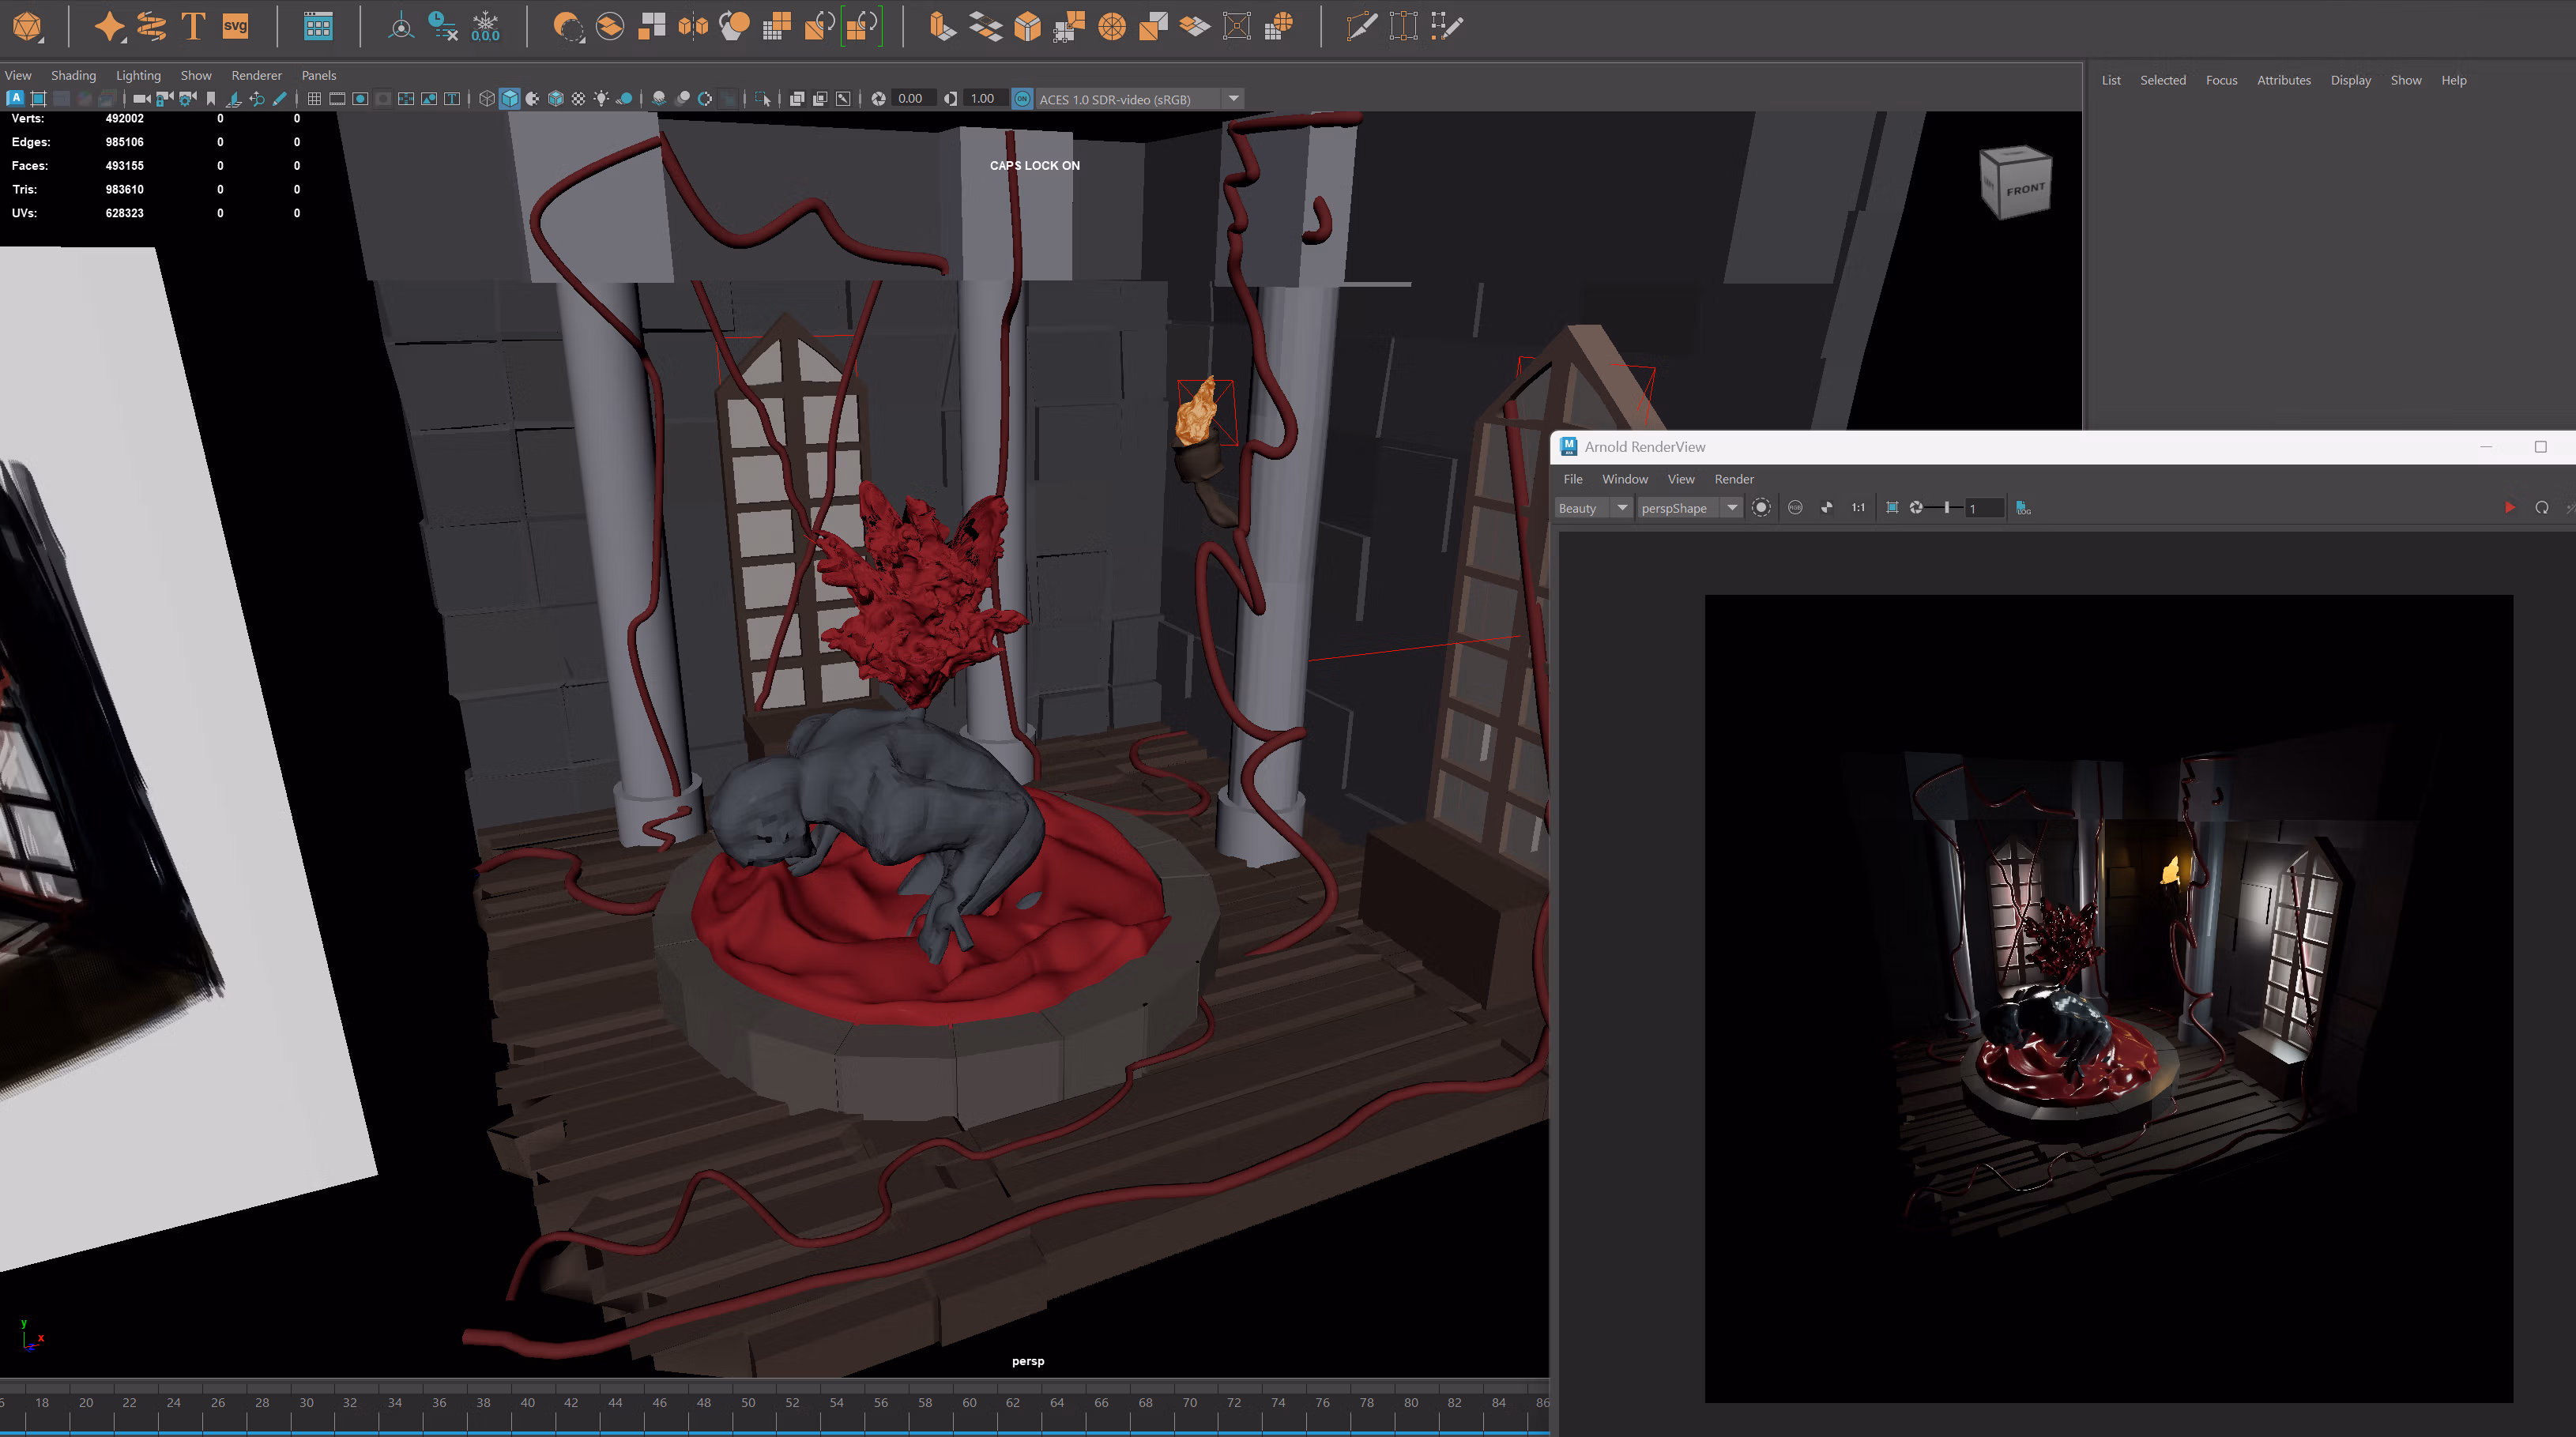
I have further developed the diorama, such as having fixed the color of the blood to stand out more, and fixed the lighting to work even better for my diorama. Additionally I altered the floor to make it round off more and separated the floor boards further to make the overall design more unique.
Leave a Reply